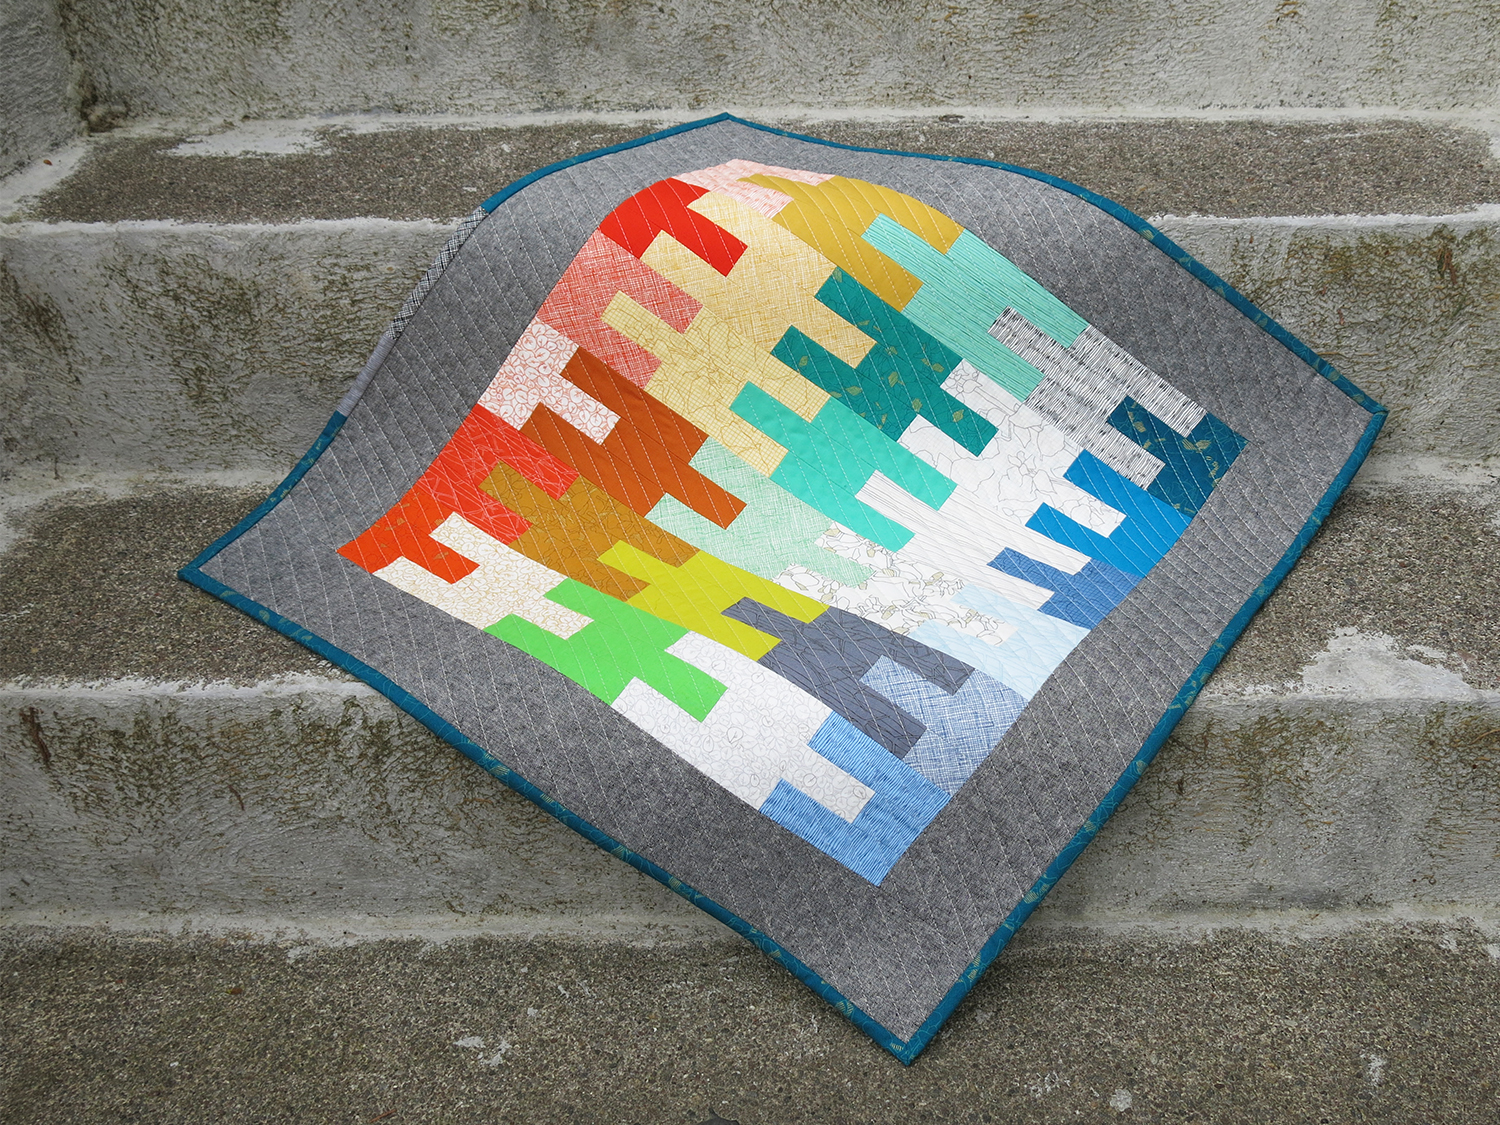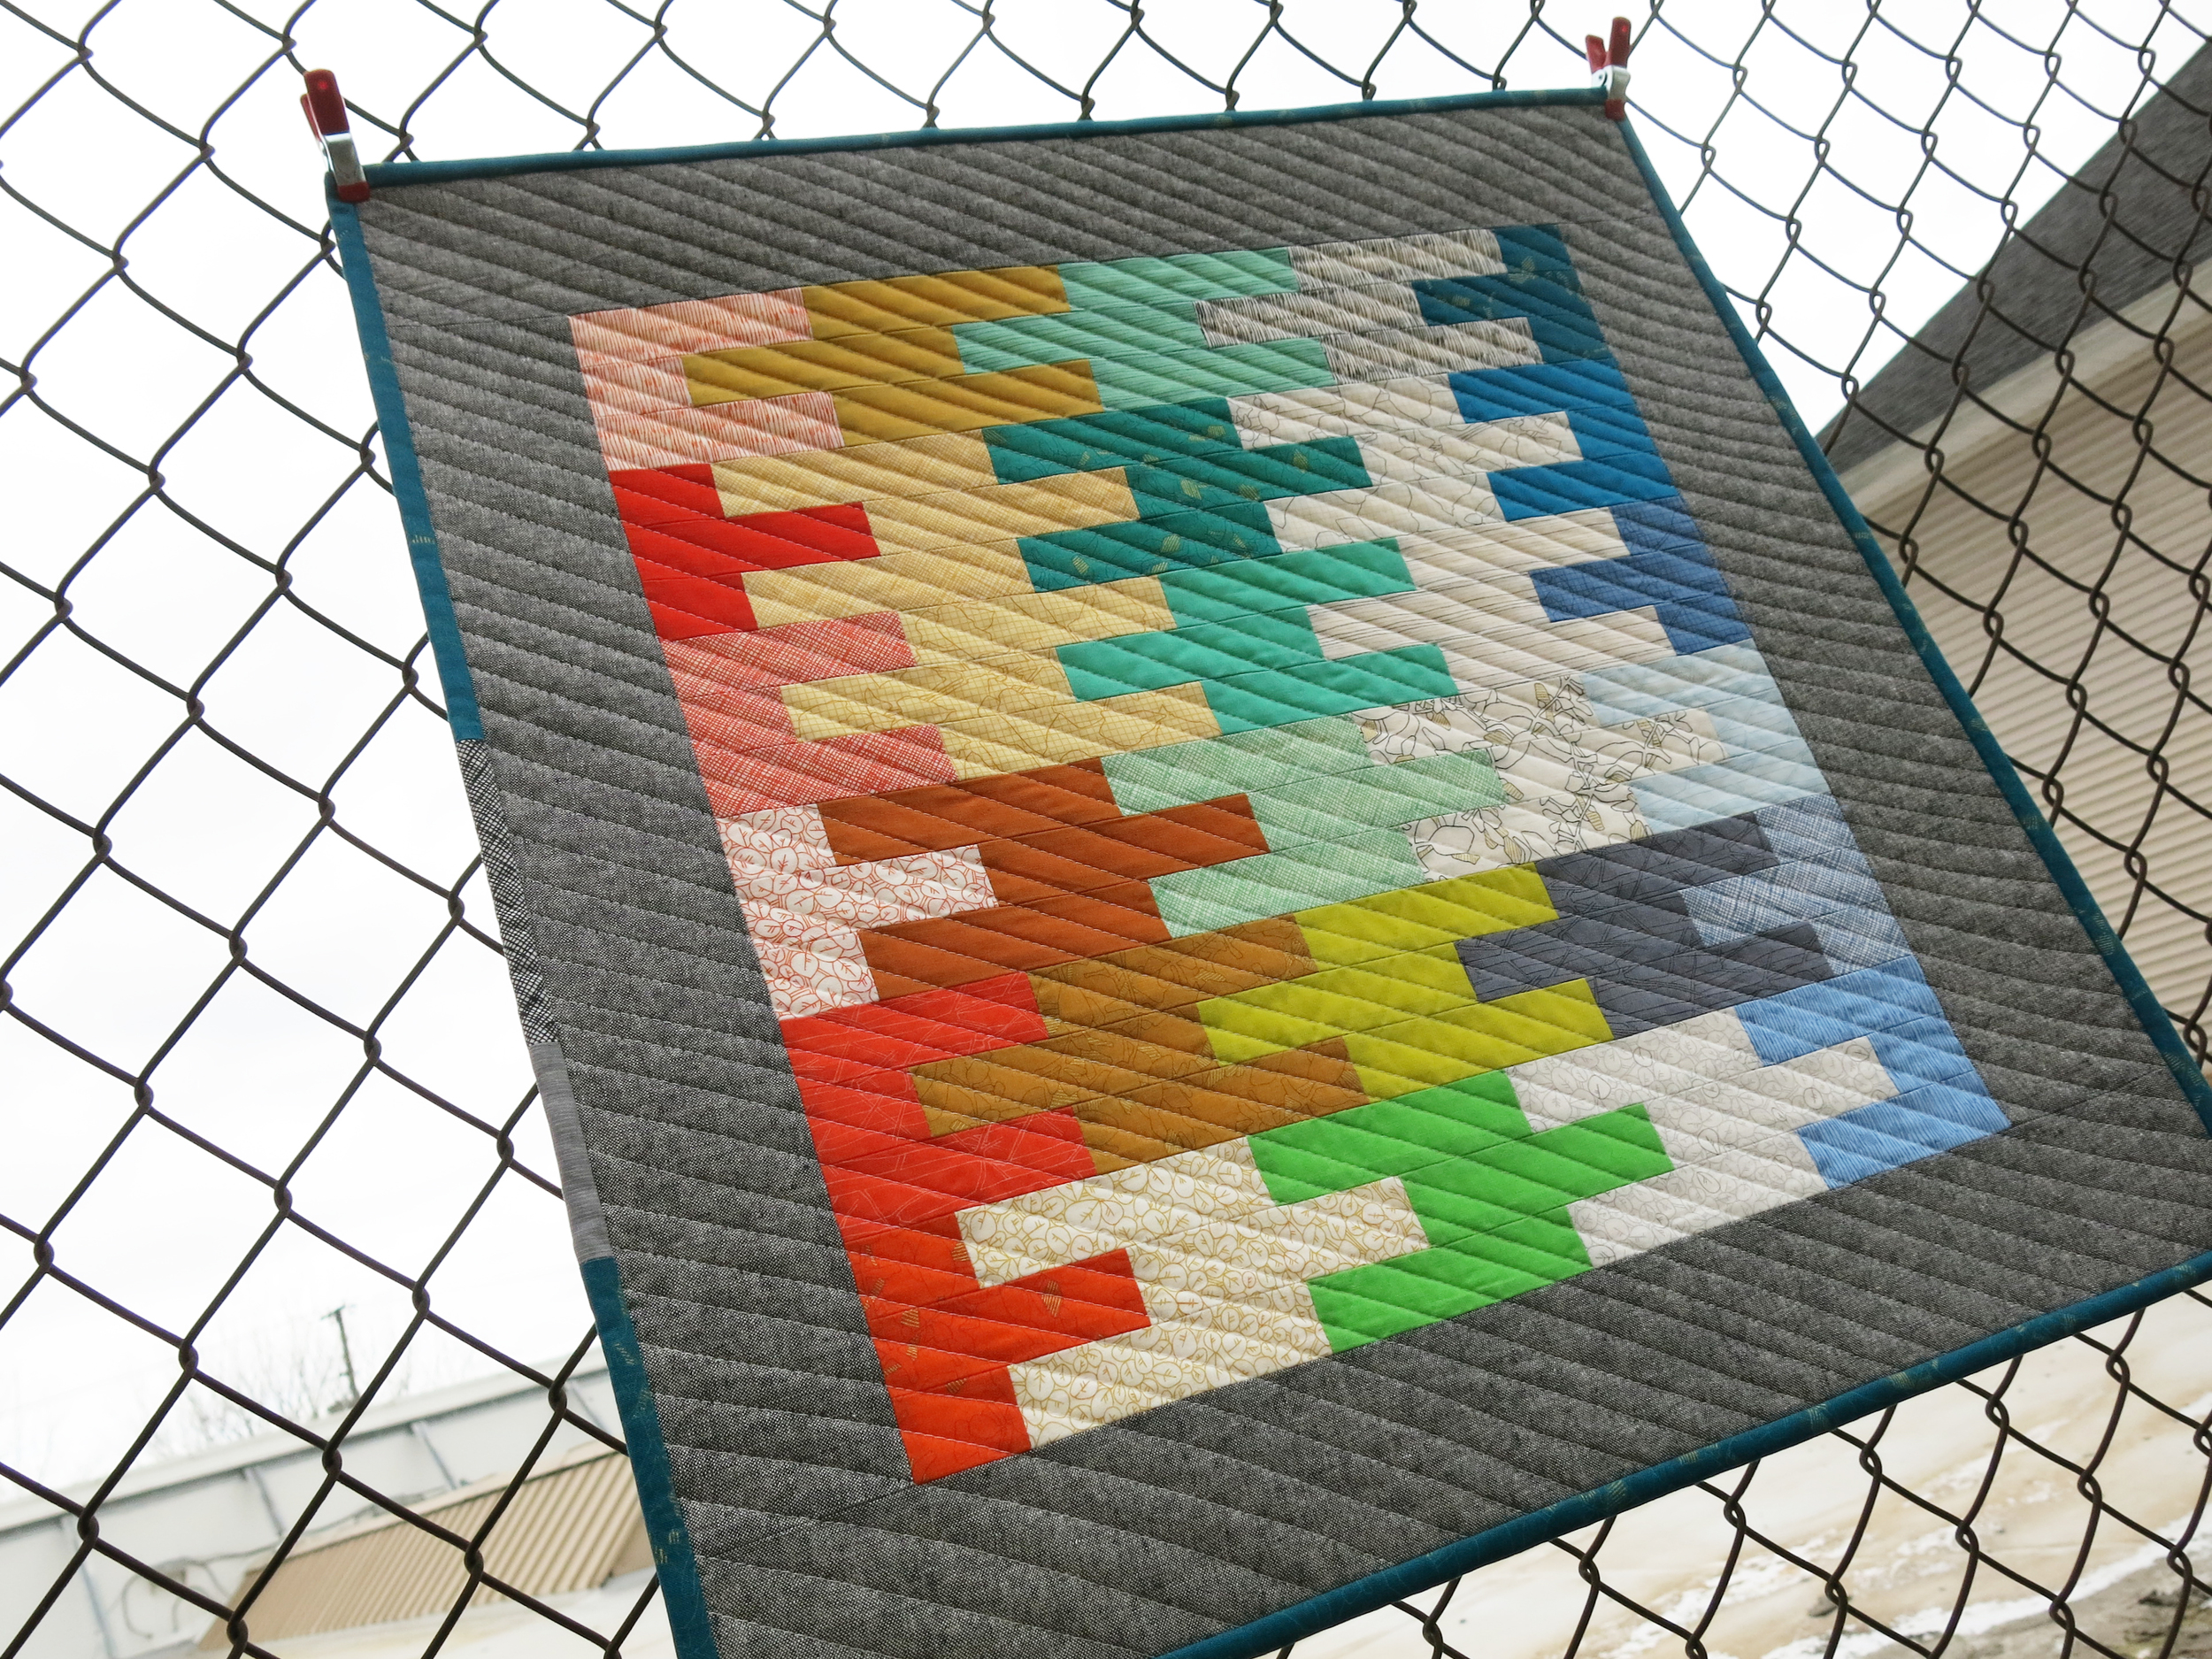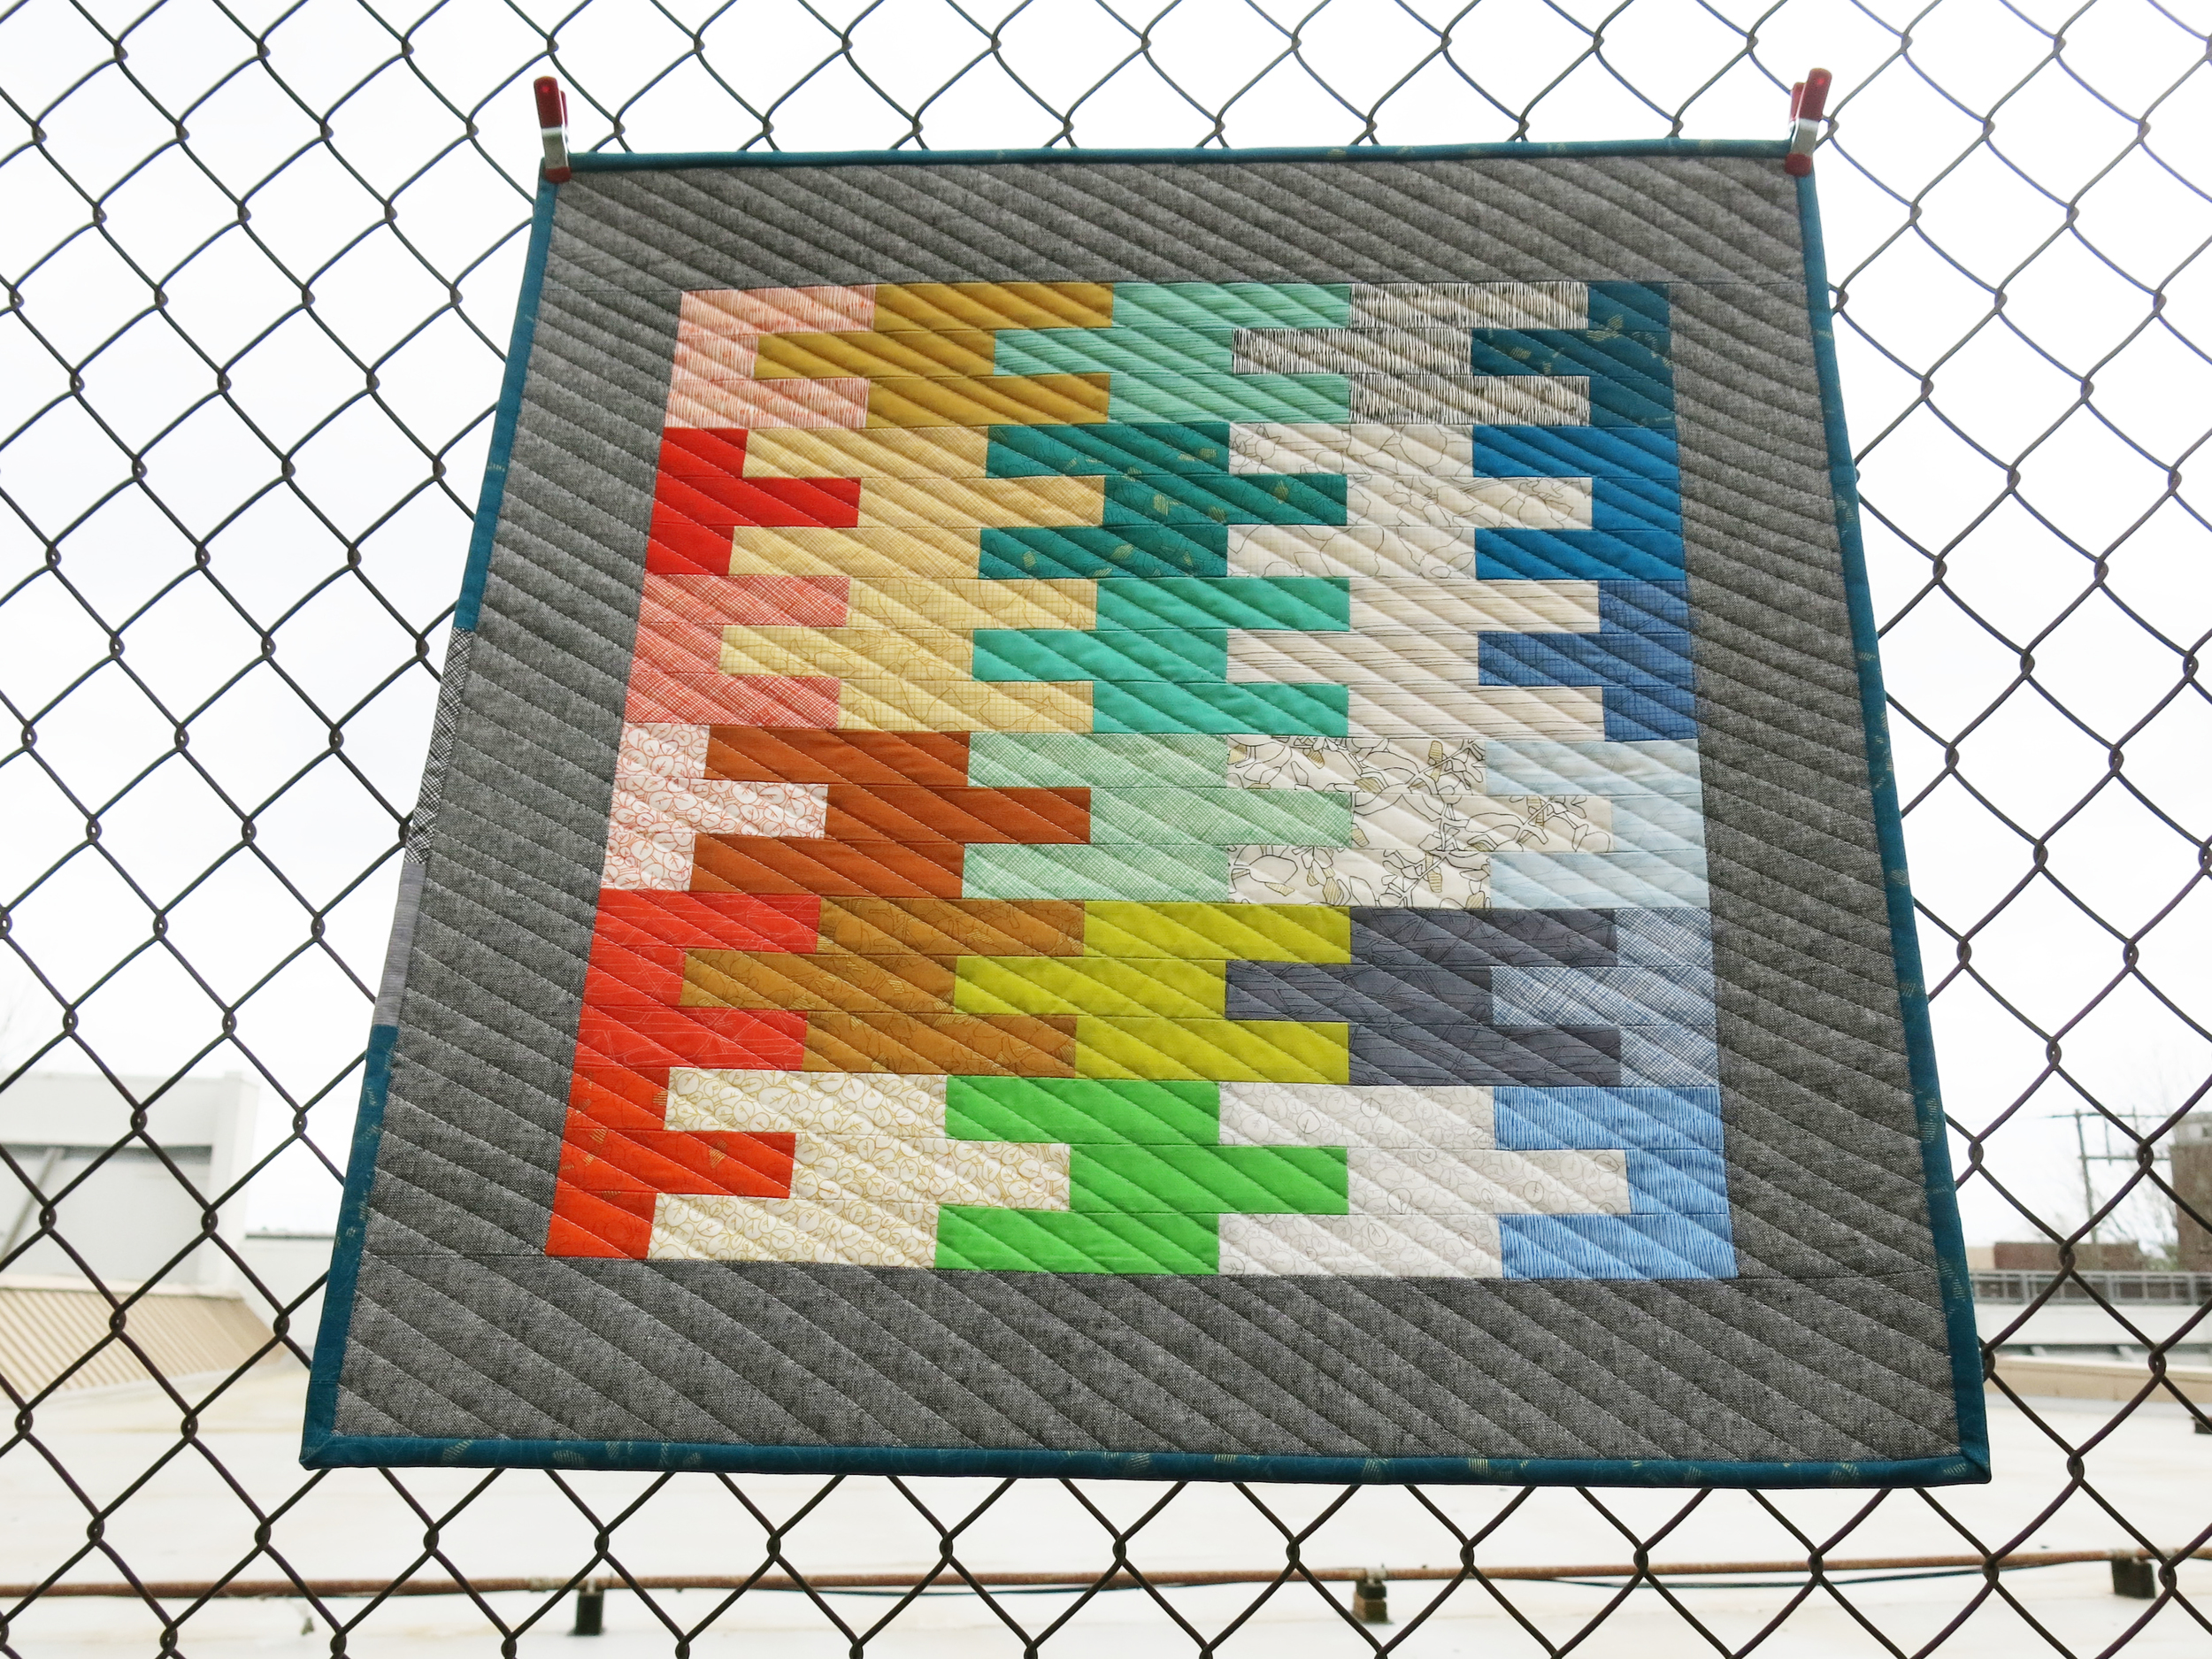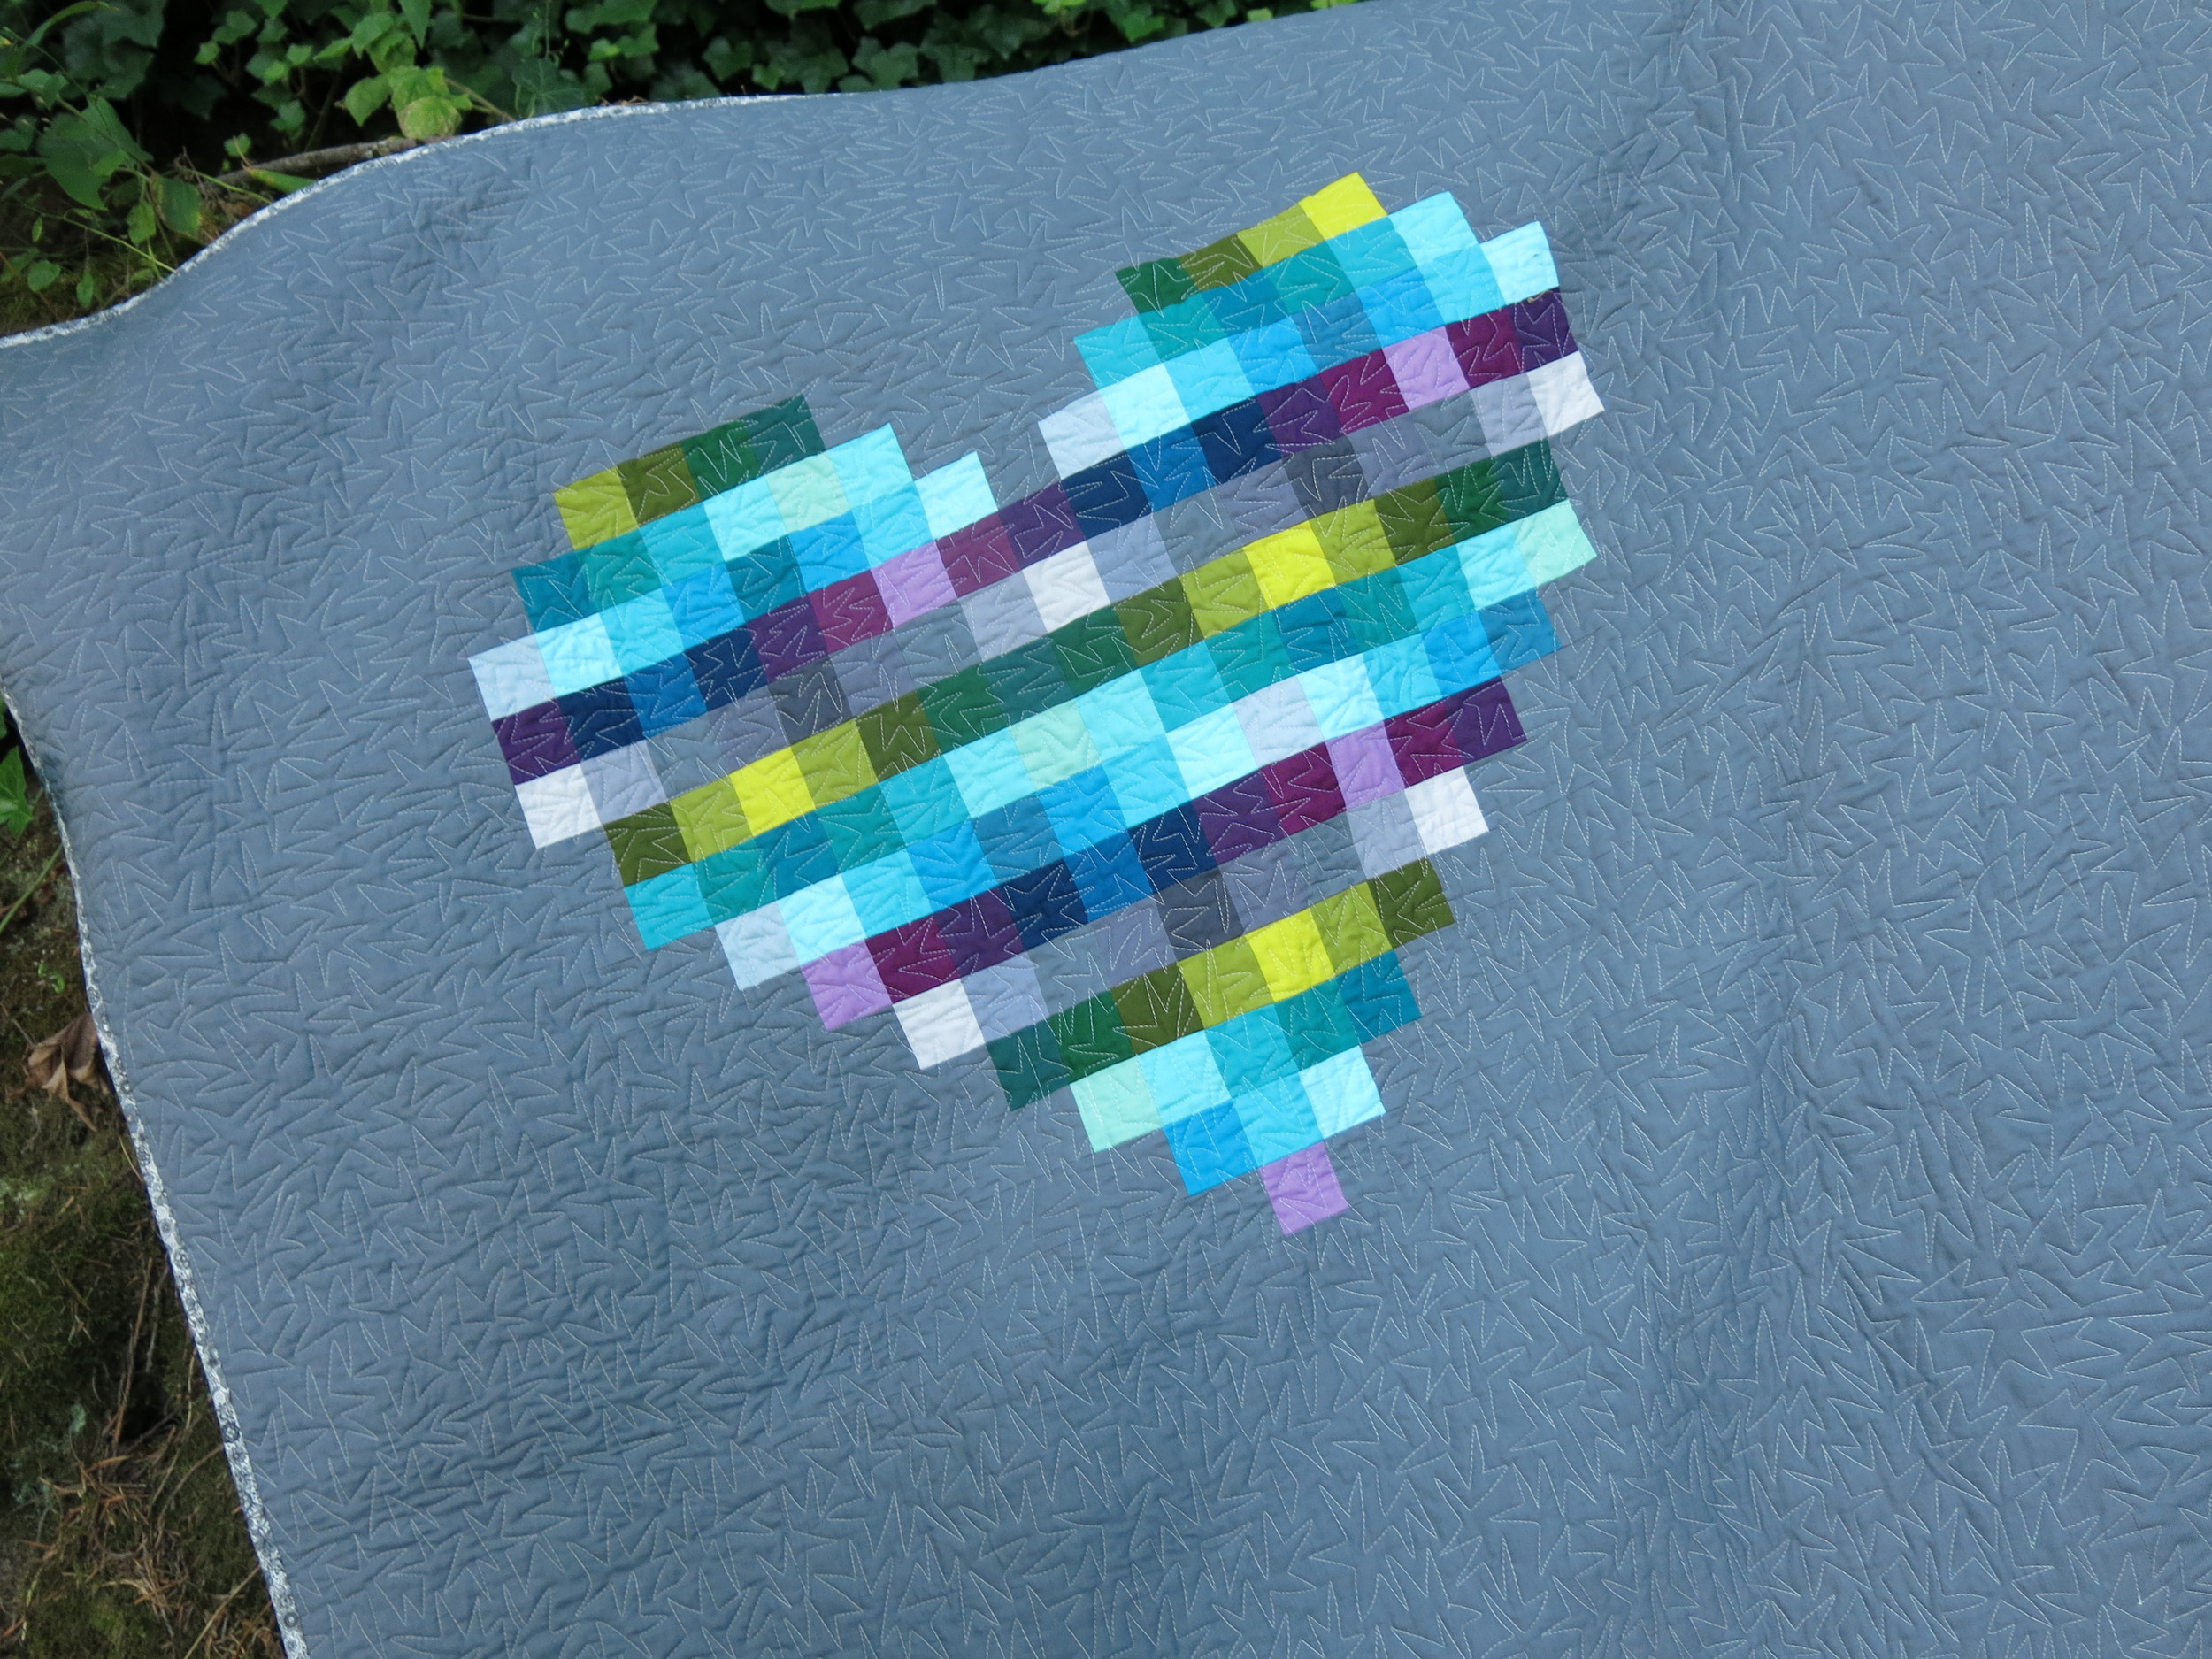
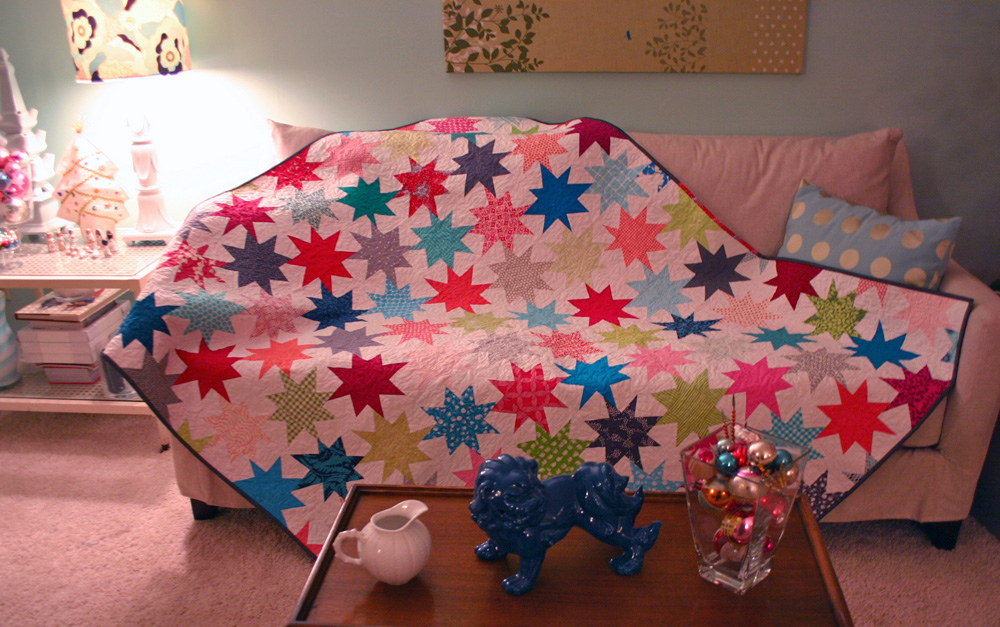

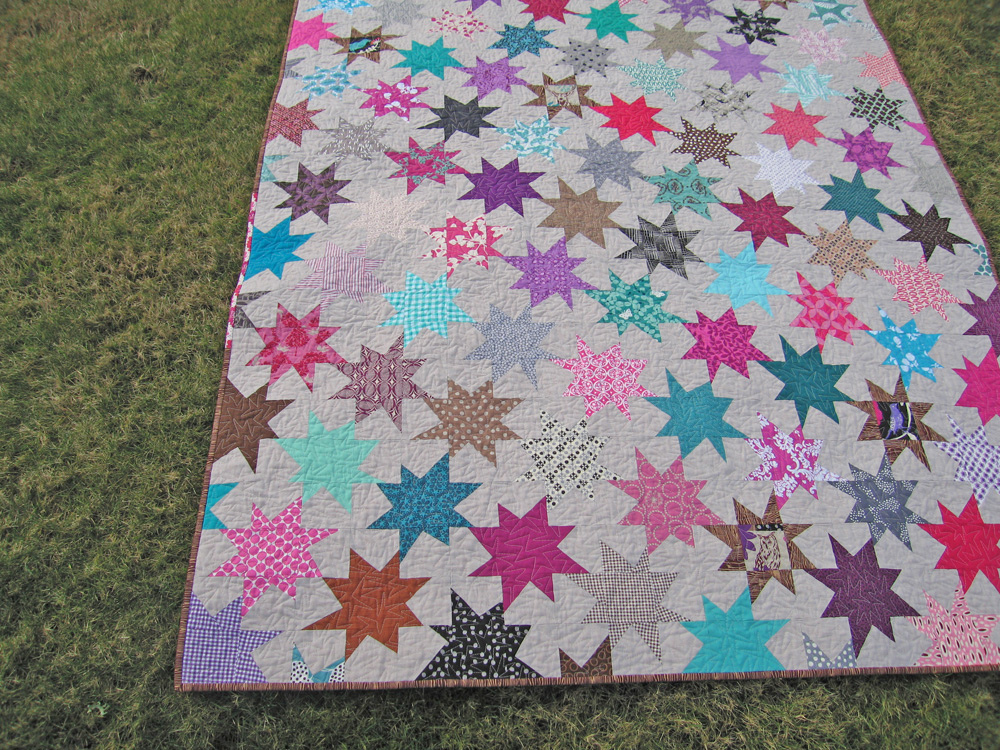
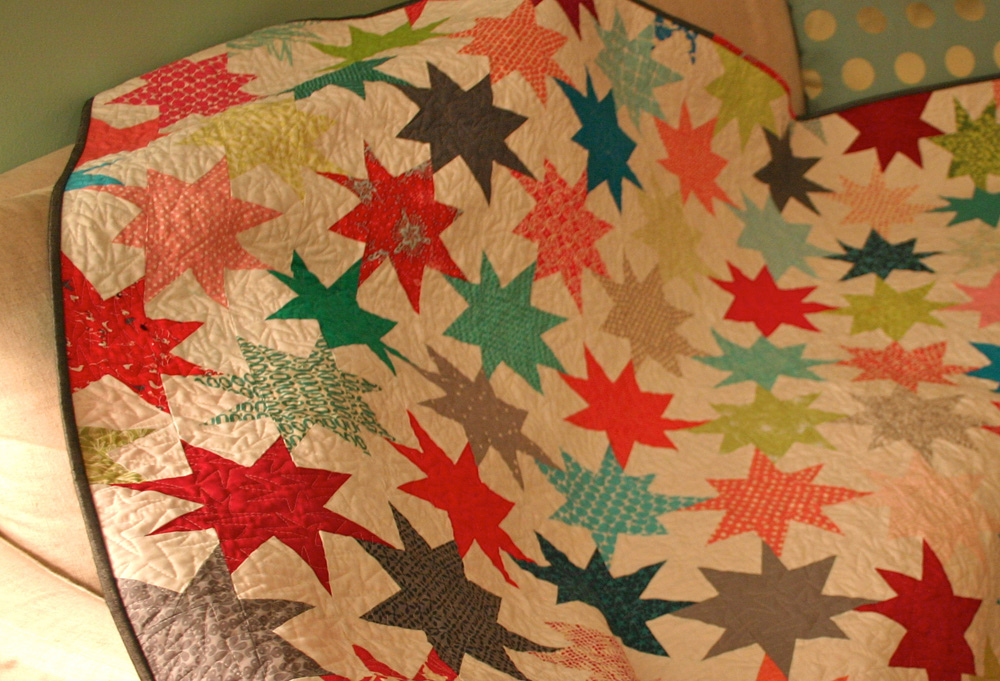
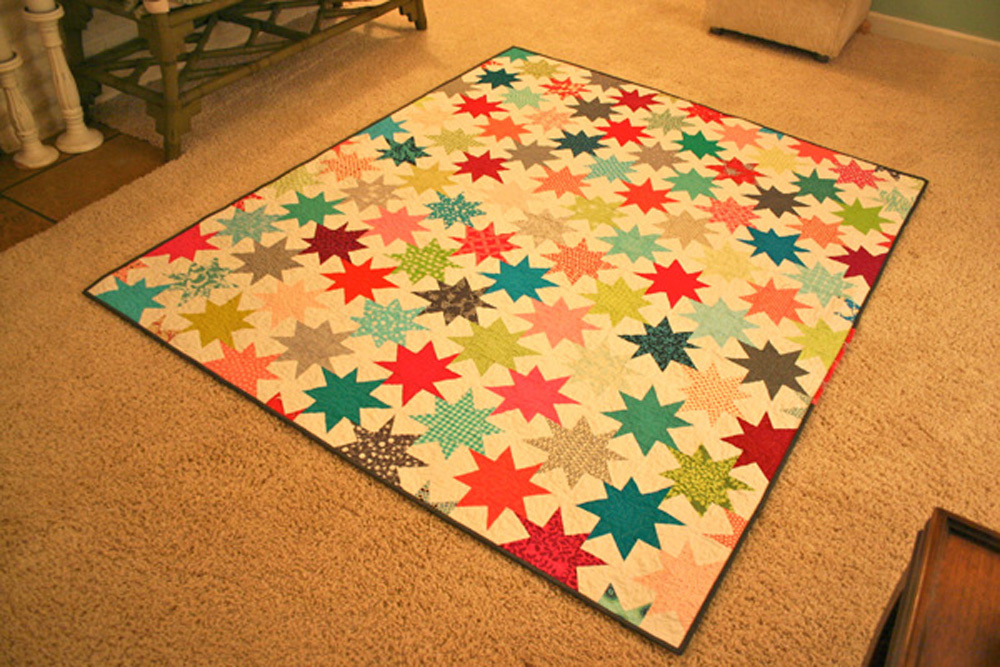
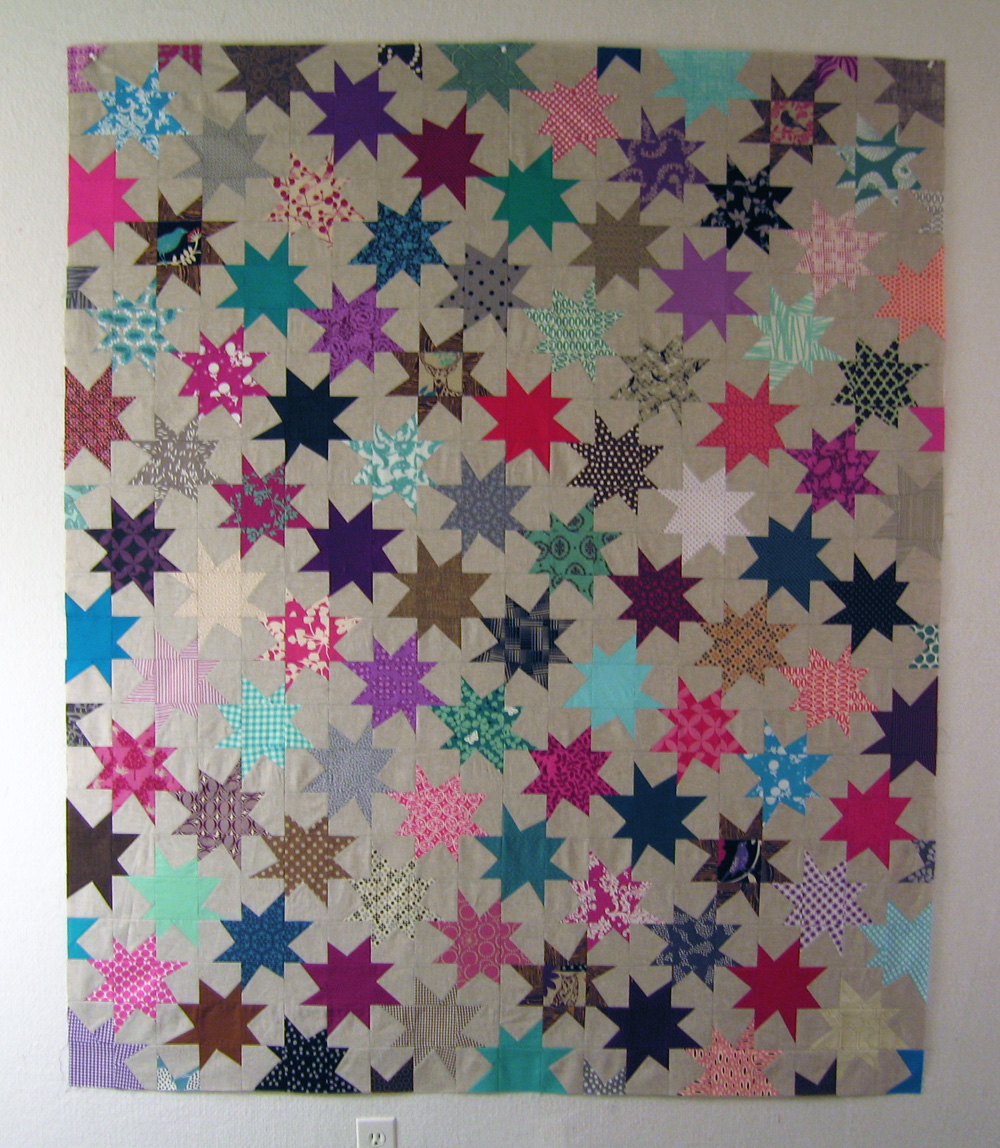
A combination of sparkle and the "Pow!" and "Bam!" shapes that happen when cartoon characters punch each other, Sparkle Punch is a 60" x 72" quilt with an unconventional nested stars layout. The wonky stars on this quilt add even more personality to all of your favorite fabric scraps!

Materials
- Assorted 3-1/2" squares of colorful fabrics, as detailed below under Making the Stars
- 3-1/2 yards neutral solid fabric for the background/negative space
- 1-1/4 yard each of 4 different solid fabrics for the quilt back
- 5/8 yard fabric for binding
Note: Yardages are based on fabric at least 42" wide. My background is Essex yarn-dyed linen blend in Flax. For the quilt back, I used Kona solids in Thistle, Jade Green, Pomegranate, and Charcoal. The featured print (with the deer) is from one of Etsuko Furuya's Echino collections for Kokka of Japan.
You can use as many or few different fabrics for your stars as you want, but here are some suggestions:
- Small to medium monochromatic prints and solids will show off the sharp edges of the stars more readily than larger, busier, and multicolored prints.
- Making your stars using fabrics with a range of value (light vs. dark), intensity (bright vs. neutral), and/or texture (print vs. solid) will add visual interest and movement. It will make your quilt sparkle!
- The partial stars will all end up around the edges of the quilt, so make sure they’re not all the same color or fabric.
- Most of my sets of squares are cut from the same fabric, but I did include a few sets with 4 identical squares for the points and 1 fussy-cut square for the center.
Cutting Fabric for the Stars
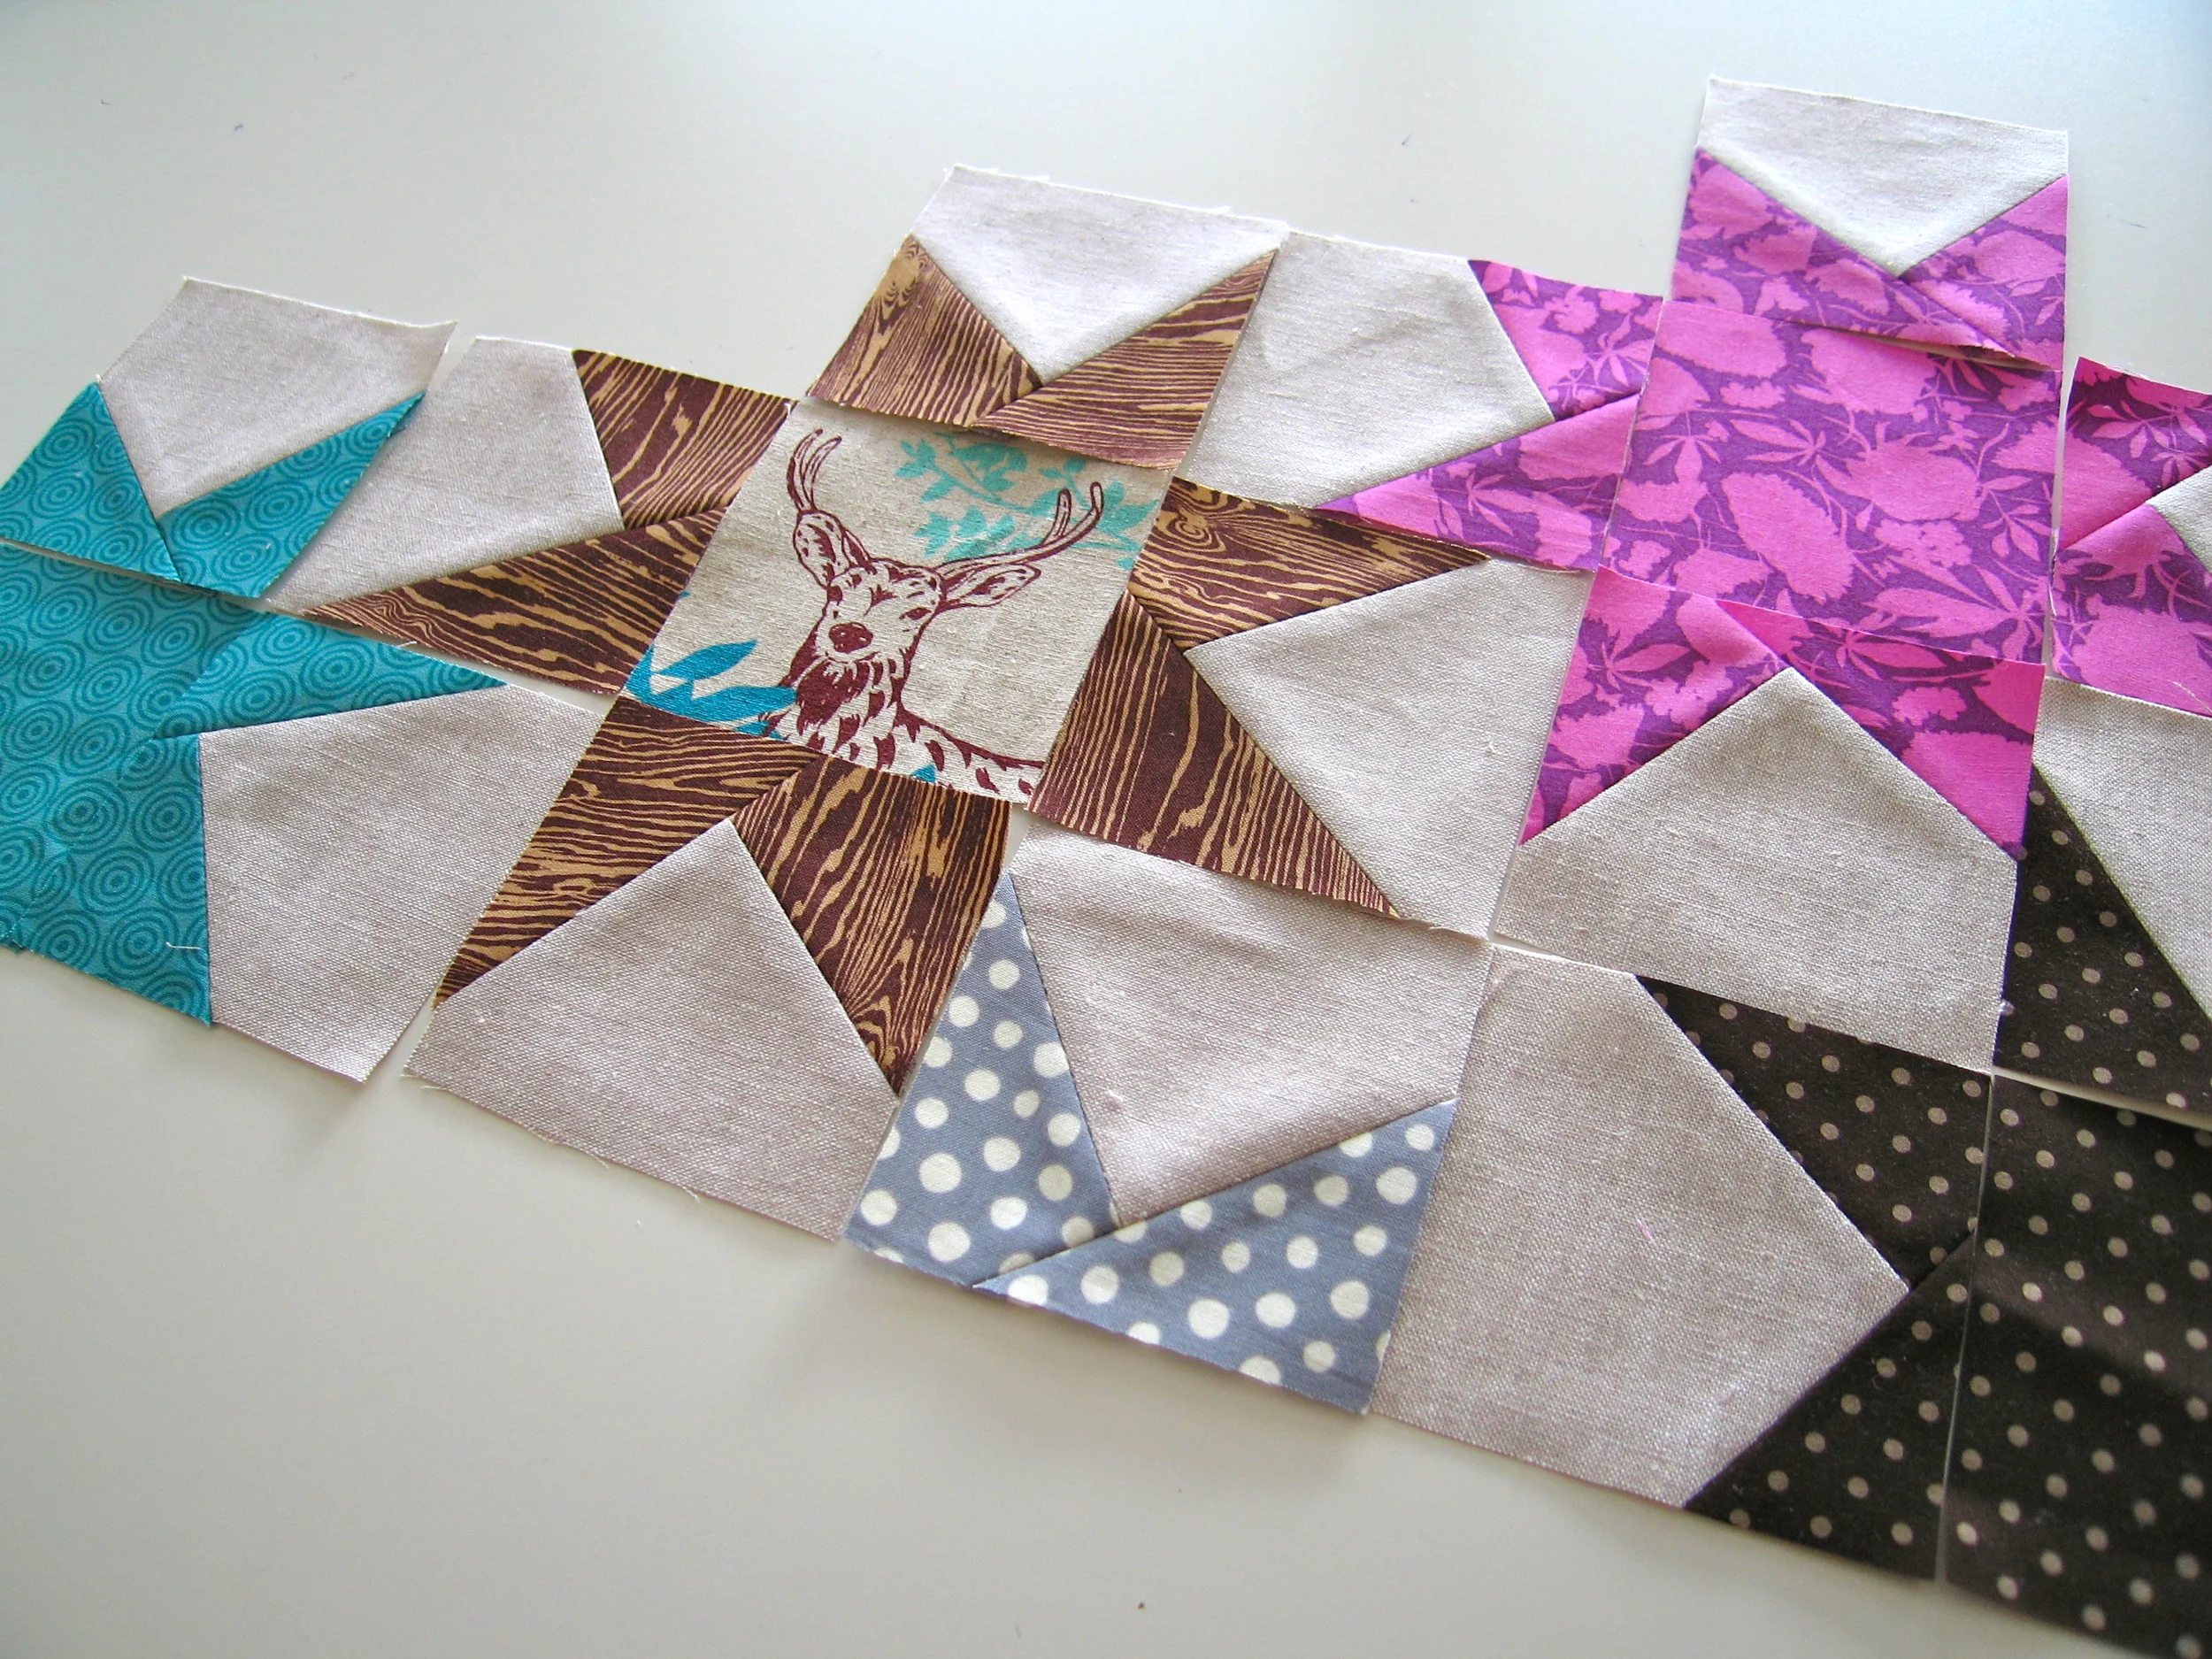
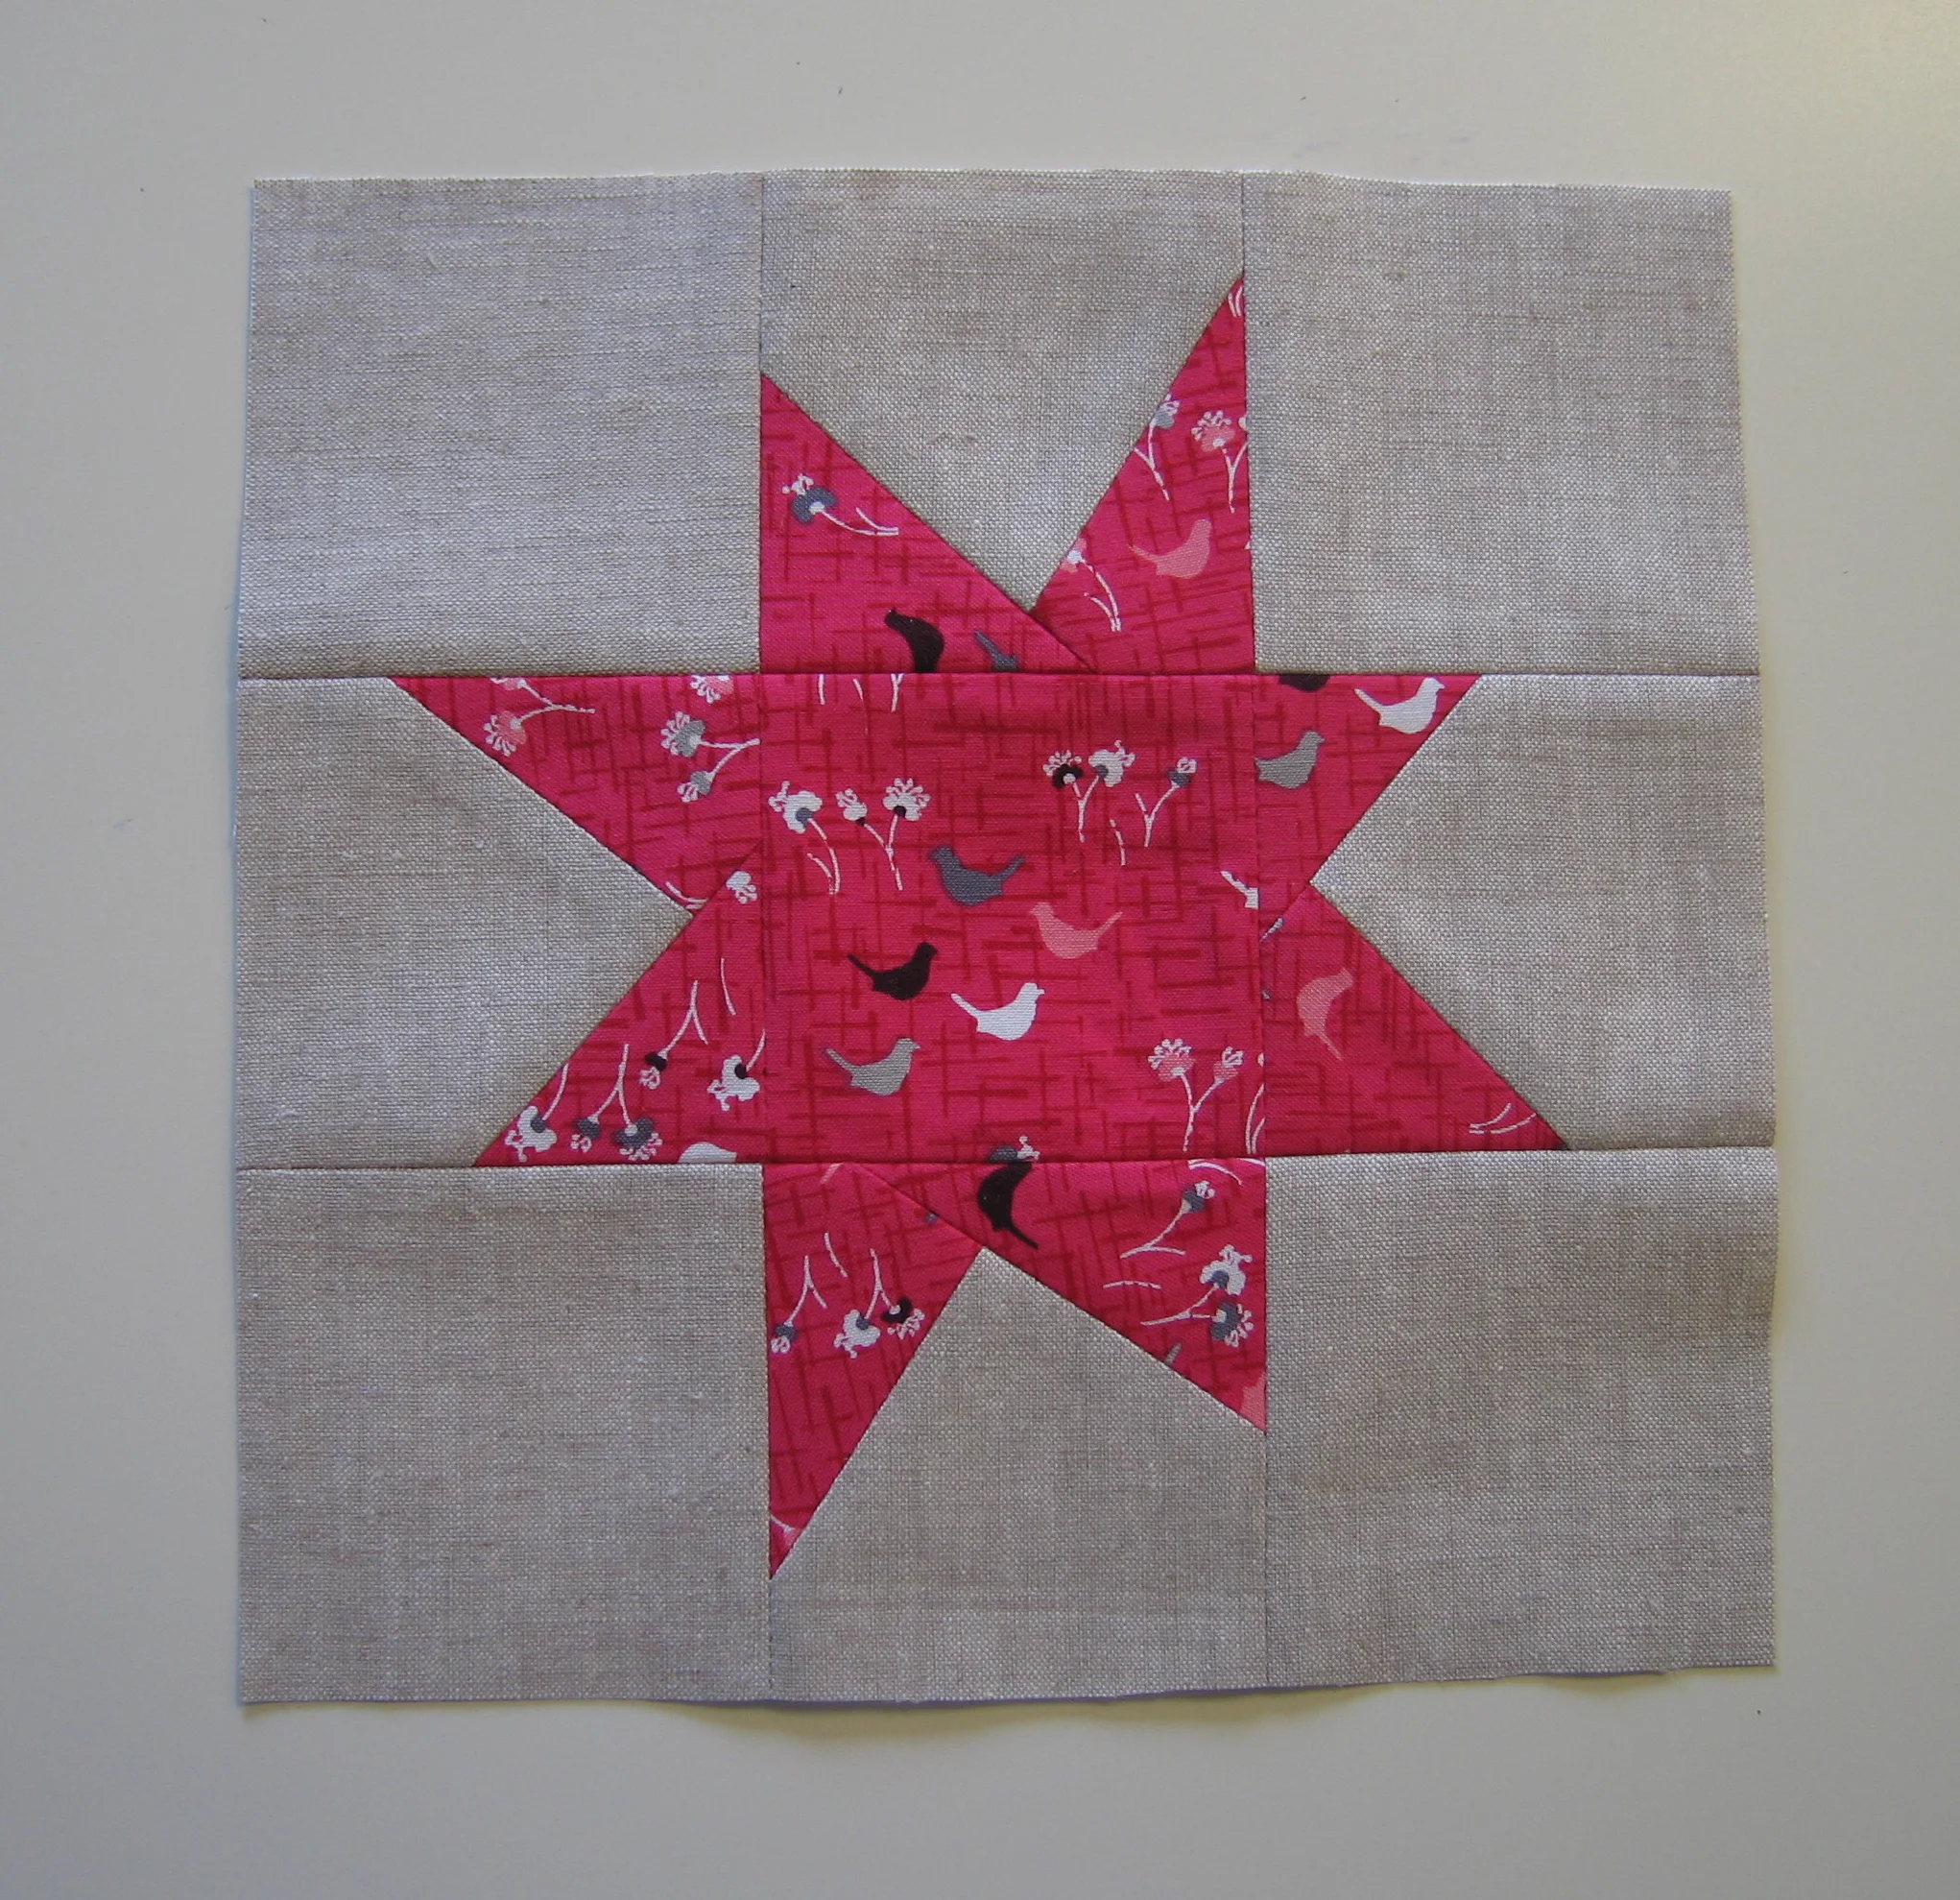
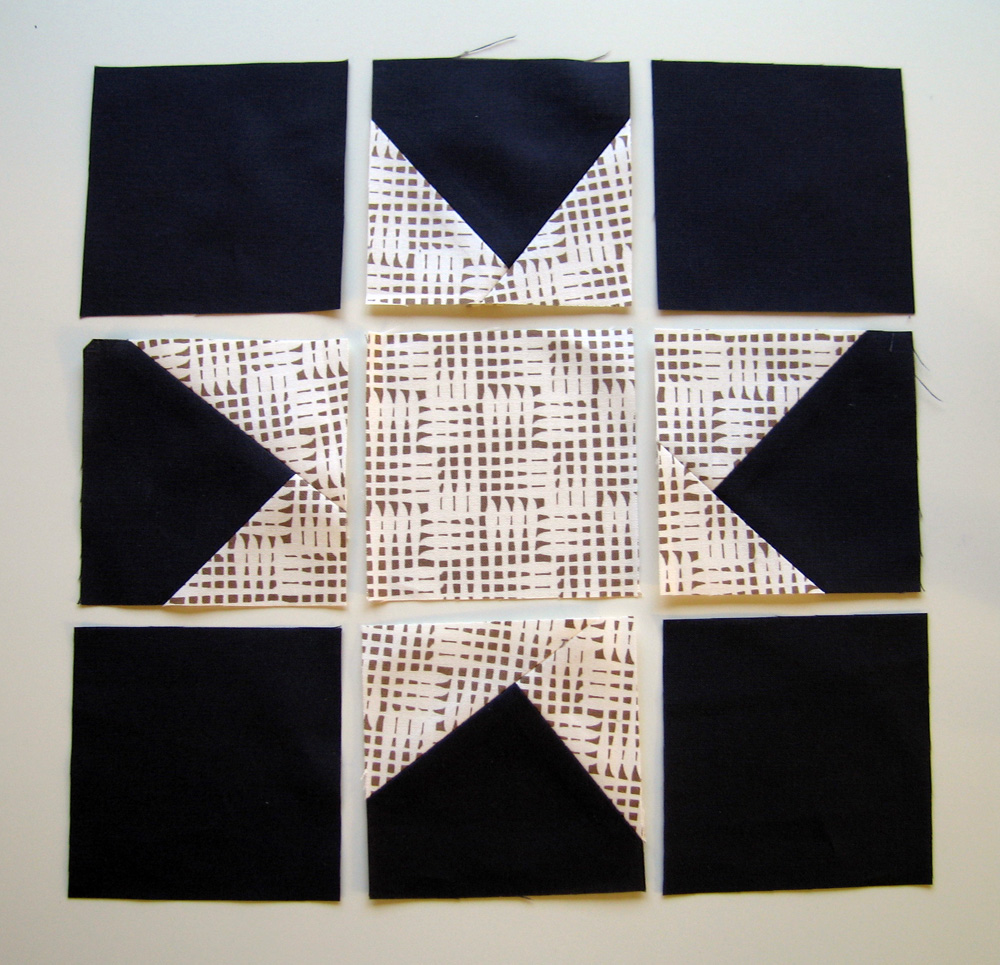
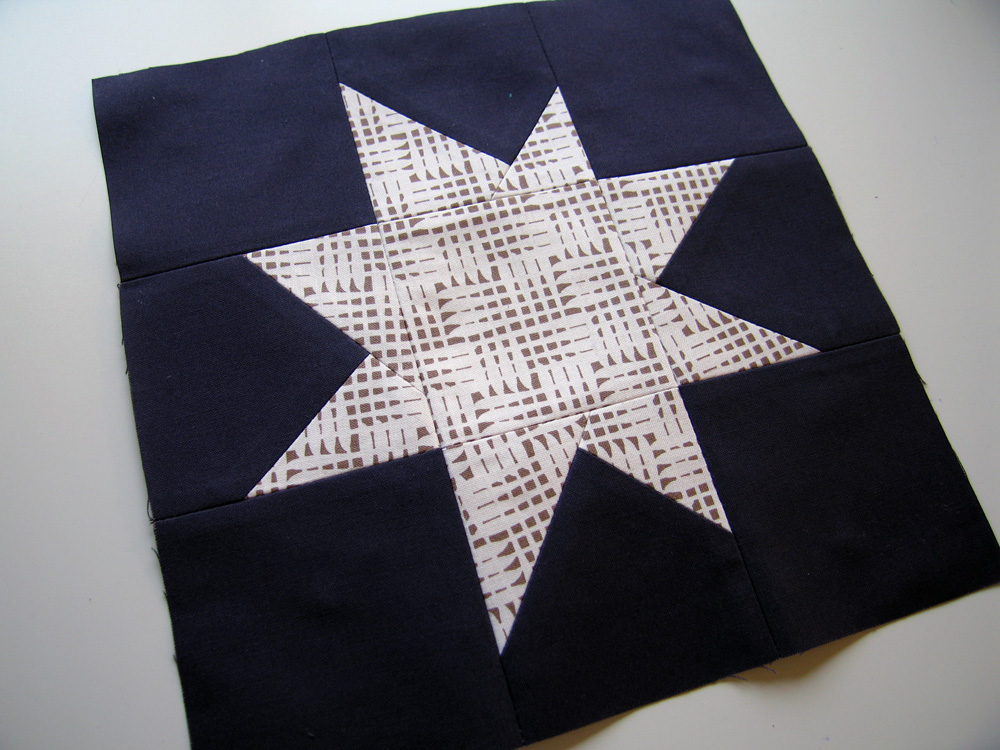
Conventional star blocks are usually made with 9 components, like the block shown above. In a conventional star quilt, blocks would be finished and then sewn into a quilt top. For this quilt, we're eliminating the four corner units so the stars can be nestled together. This creates a plus-sign shape that would be difficult to sew together in the conventional way. Instead, we're going to make sets of block components and wait until we're planning the quilt top layout to sew them together.

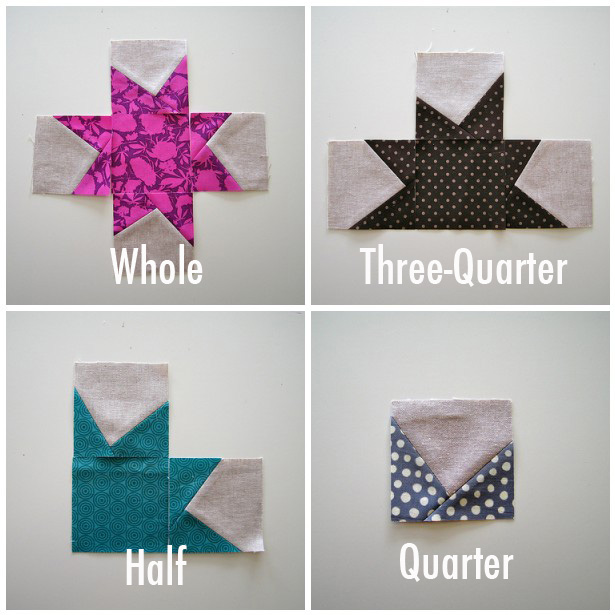
In order to make a rectangular quilt (i.e. to fill in the edges and corners) we'll also need some quarter stars, half stars, and three-quarter stars.
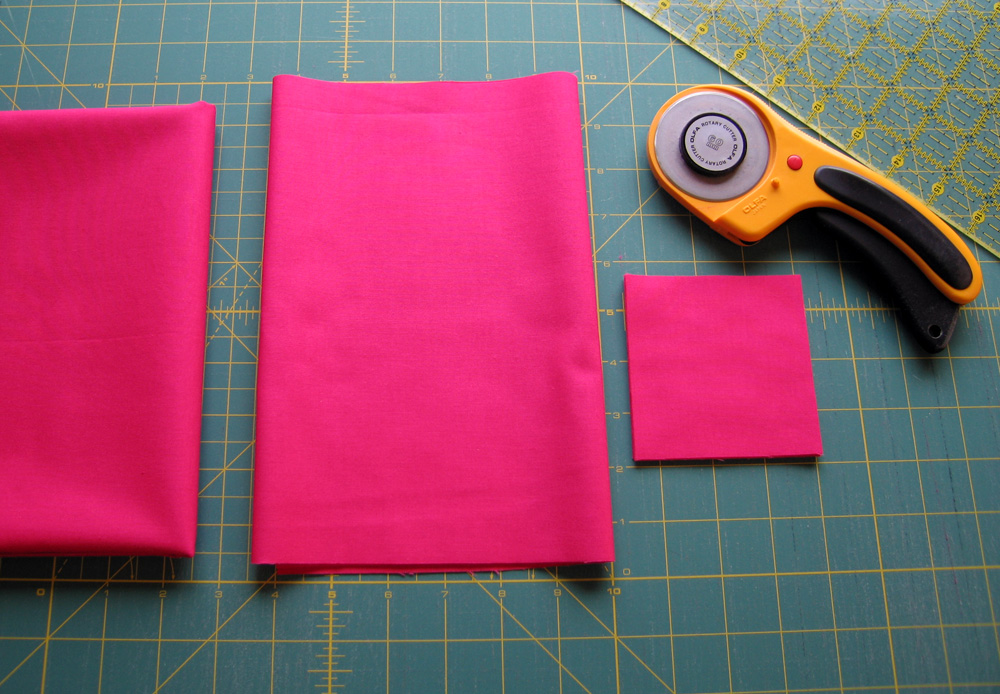
All of the stars are made with sets of 3-1/2” x 3-1/2” squares. For the stars (just the stars - not the negative space behind them) you will need:
- 80 sets of 5 squares to make whole stars for the quilt top
- 4 sets of 5 squares to make whole stars for the quilt back
- 14 sets of 4 squares to make three-quarter stars for the quilt top
- 2 sets of 3 squares to make half stars for the quilt top
- 18 single squares to make quarter stars for the quilt top

From the background/negative space fabric, cut 35 strips 3-1/2" x width of fabric and subcut into 384 squares 3-1/2" x 3-1/2" each.

Making the Star Components
1. Each star will be made from 5 colorful fabric squares and 4 squares of your negative space fabric. Reserve 1 of the colorful fabric squares for the center of the star and cut the other 4 in half diagonally, creating 8 right triangles. These triangles will become the points of the star.
2. Place 1 of the triangles, face down, over the lower right corner of 1 of the negative space squares, tilting it at a slightly wonky angle. Sew in place, keeping your seam within 1/4" of the edge of the triangle.
3. Use a ruler and rotary cutter to trim away the excess negative space fabric, creating a 1/4" seam allowance.
4. Press the seam open, creating a wonky star point where the negative space fabric used to be.

5. Repeat the same process to sew a second triangle to the lower left corner of the same square of negative space fabric.
6. Trim away the excess fabric, creating a 1/4" seam allowance and press the seam open.
7. Square up the finished points unit to 3-1/2" x 3-1/2".
8. Repeat Steps 2 - 7 to make 3 more points units (for a total of 4). Stack the finished points units together with their matching center square.

Making the Sparkle Punch quilt. ohfransson.com
Important Note: The triangles need to be placed so that, after being sewn down and pressed, they cover the entire area that was formerly occupied by the negative space fabric. This will ensure that your finished block components measure a perfect 3-1/2" x 3-1/2", which is essential to having your quilt top come together smoothly.
Using larger triangles (or other scraps) can make this step easier, but it can also produce a tremendous amount of waste, which is why I recommend using the triangles cut from 3-1/2" squares. With a little practice, it won't be so difficult to make those points work!
A little wonkiness goes a long way. The crazier your angles, the more trouble you're likely to have covering the corners of your block components. If you've never done piecing like this before, it may help to practice on some scraps before moving on to your "good" fabric.
Repeat these steps to make the following sets of star components for the front of the quilt:
- 80 Whole Stars: Follow directions, as written.
- 14 Three-Quarter Stars: Follow directions, cutting only 3 star fabric squares in half (to make 6 triangles) and making 3 points units.
- 2 Half Stars: Follow directions, cutting only 2 star fabric squares in half (to make 4 triangles) and making 2 points units.
- 18 Quarter Stars: Follow directions, cutting the star fabric square in half (to make 2 triangles) and making 1 points unit.

Helpful Tools
A 3-1/2" x 3-1/2" ruler can make it easy to square up the individual block components.
If you want to get really fancy, use a rotating cutting mat to square up sets of block components without moving them.

Planning the Quilt Top Layout
Start by clearing a design wall or clean floor area at least 70" x 84".
Remember that we're still working with 3-1/2" x 3-1/2" star components (center squares and points units). Making the quilt top will result in their being sewn together, but they should not be sewn together yet.
Use the Quilt Top Layout as a guide to arrange your sets of star components as you would like them to look in your finished quilt top, creating 24 rows of 20 components each. The sets of components for the three-quarter, half, and quarter stars will end up around the edges of the quilt top, making the whole thing rectangular.
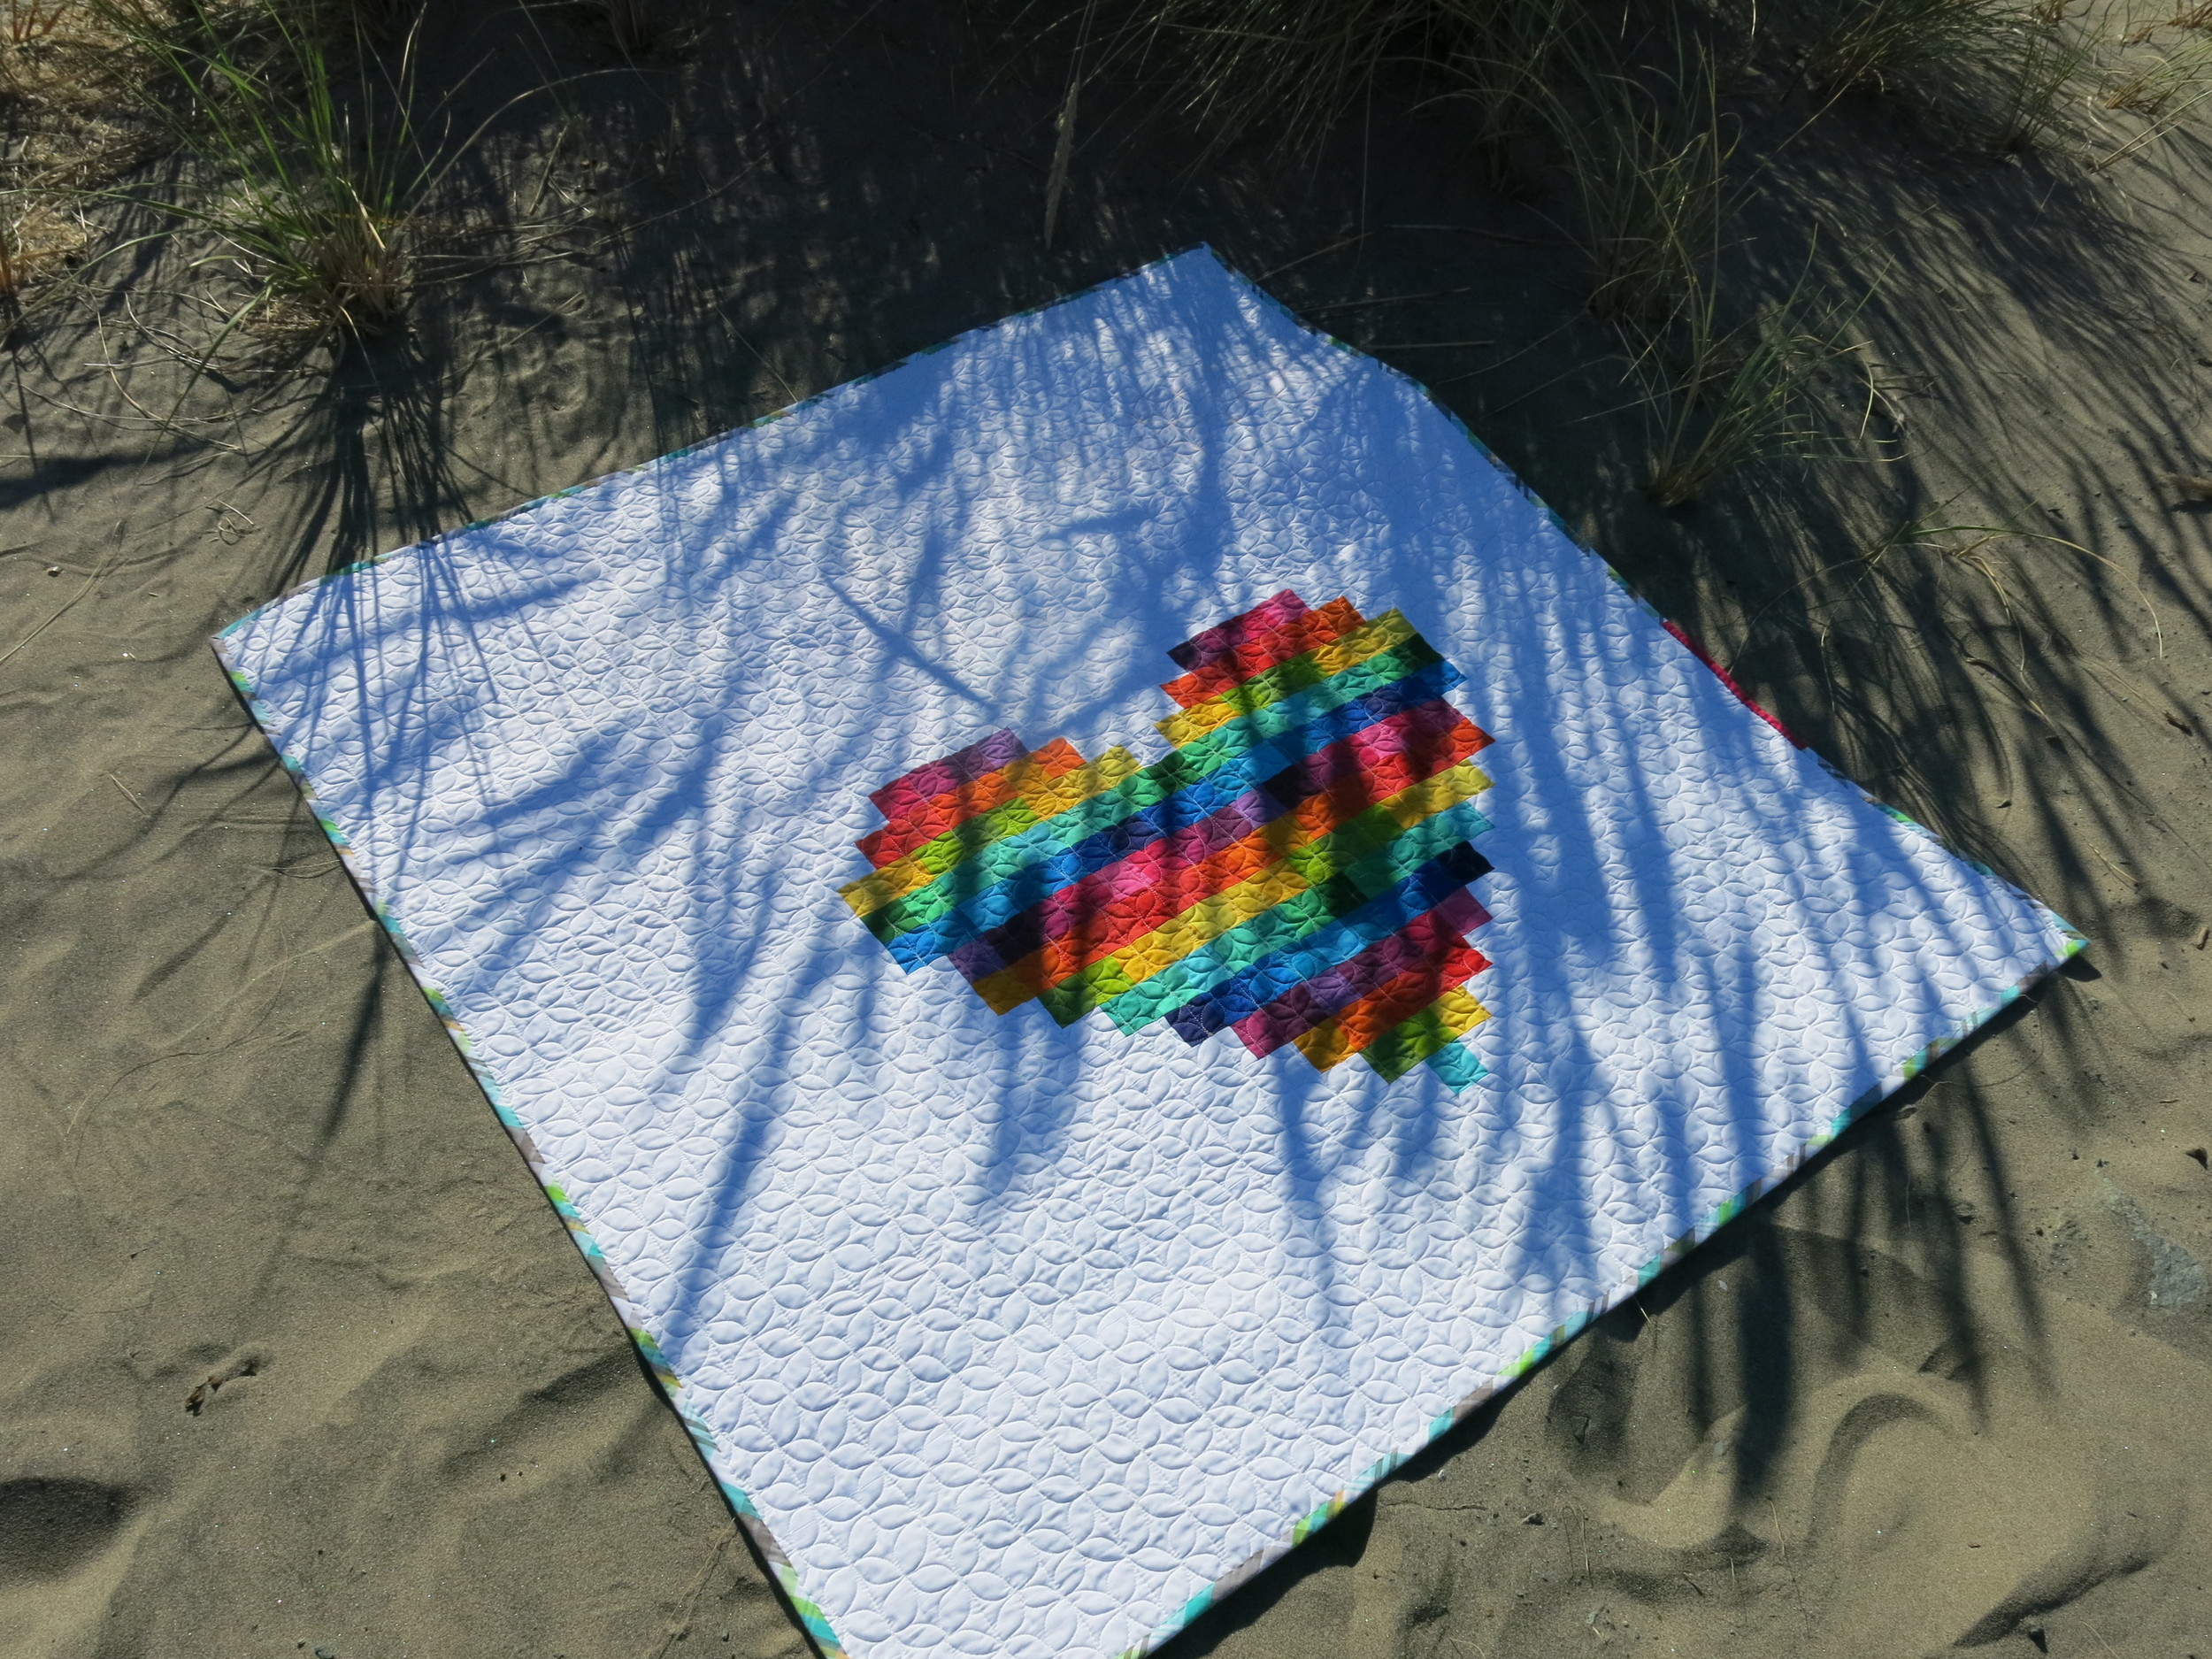
When I was arranging my block components, I found it helpful to start near the center and work my way out to the sides until my composition was 20 components wide x 24 components high. Of course, you don't have to fill in the entire space with stars. You may decide that you would rather have a more minimal composition with one or more clusters of floating stars. For a quilt like this, you'll need fewer star components and more 3-1/2" squares cut from your background fabric. Just keep in mind that, if you want your quilt to finish at 60" x 72", you'll need to create a grid with 24 rows of 20 squares each.
Making the Quilt Top
Note: All seams are sewn with a quarter inch seam allowance and pressed open.
Once you're happy with the layout, complete the following steps to finish the quilt top:
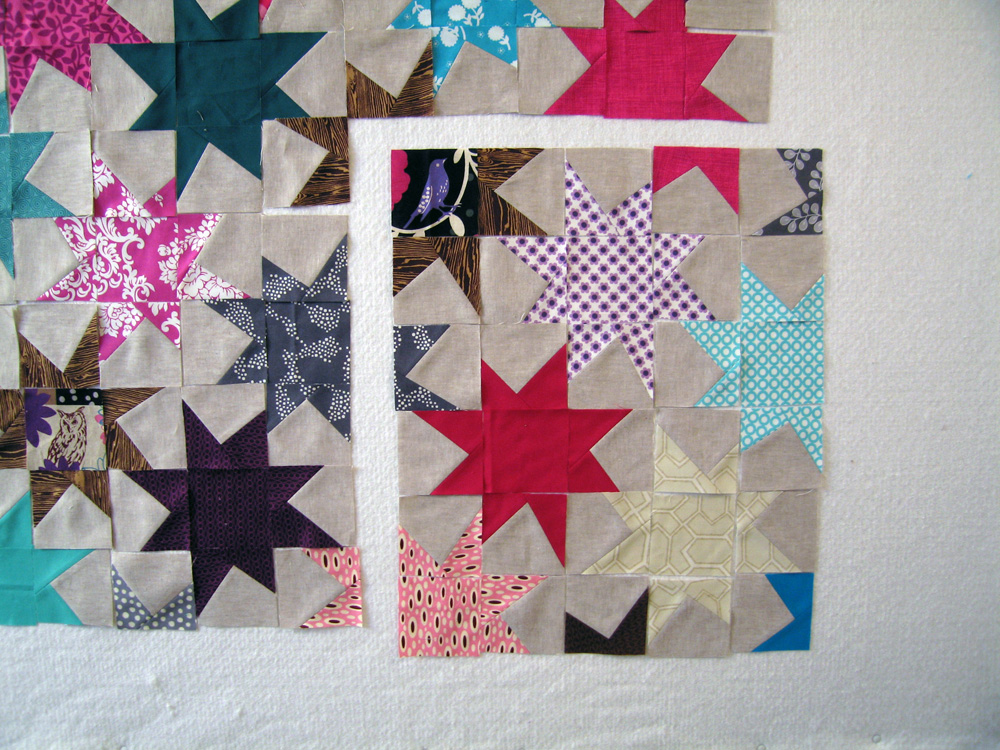
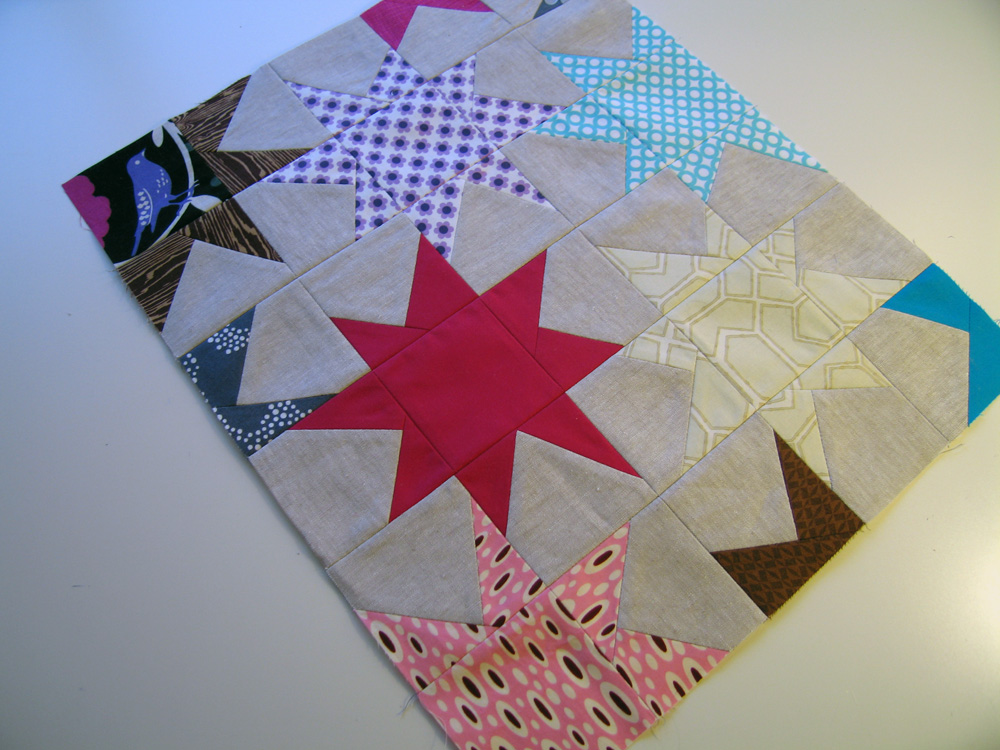
- pull aside the 30 star components (5 wide x 6 high) in the lower right corner, making sure not to disrupt their arrangement.
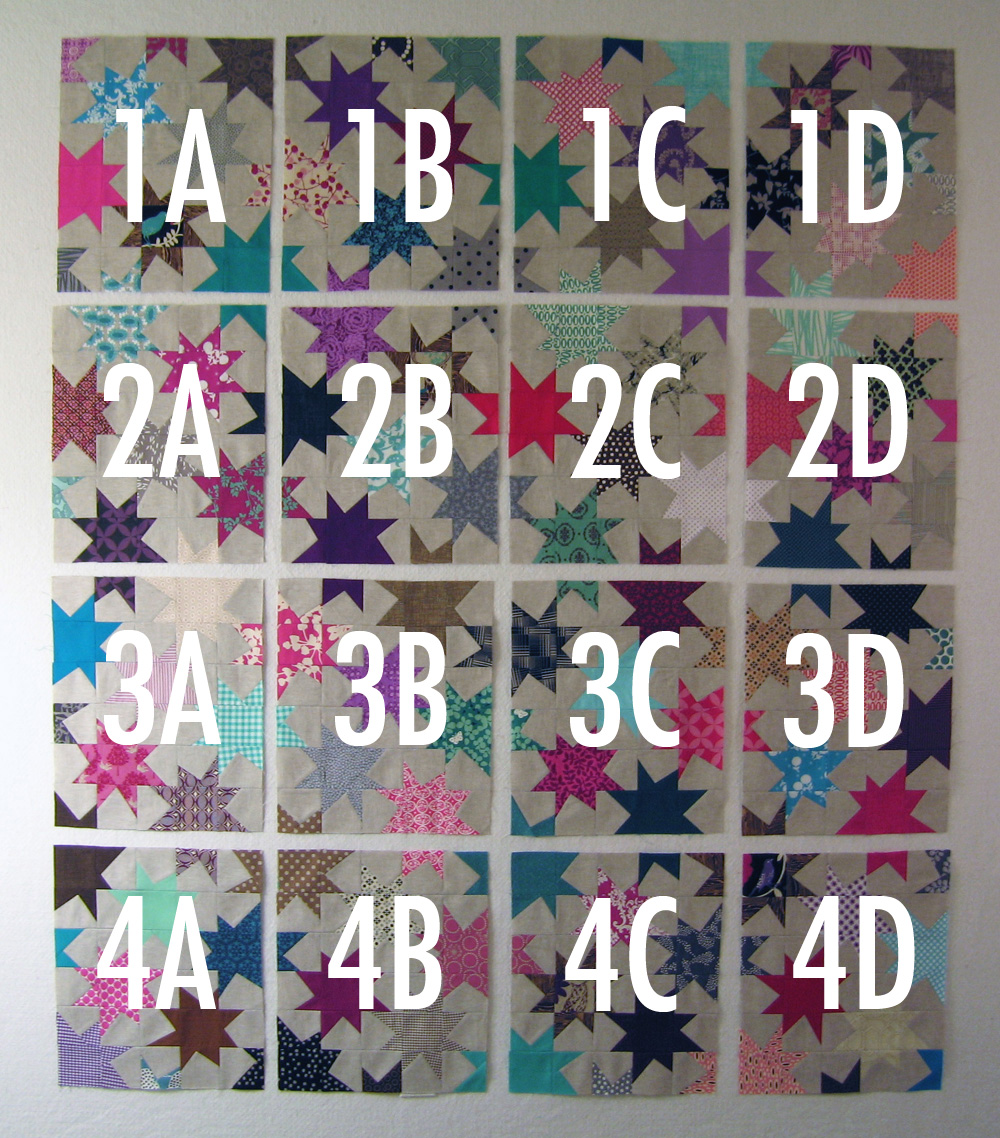
- Sew the 5 components in each row together, and then sew the 6 rows together to make a block. This is Block 4D.
- Repeat this process with the remaining star components, creating a total of 16 blocks, and making sure not to lose track of each block's placement in the overall composition. You may find it helpful to label the blocks 1A, 1B, 1C, and so on, as shown above.
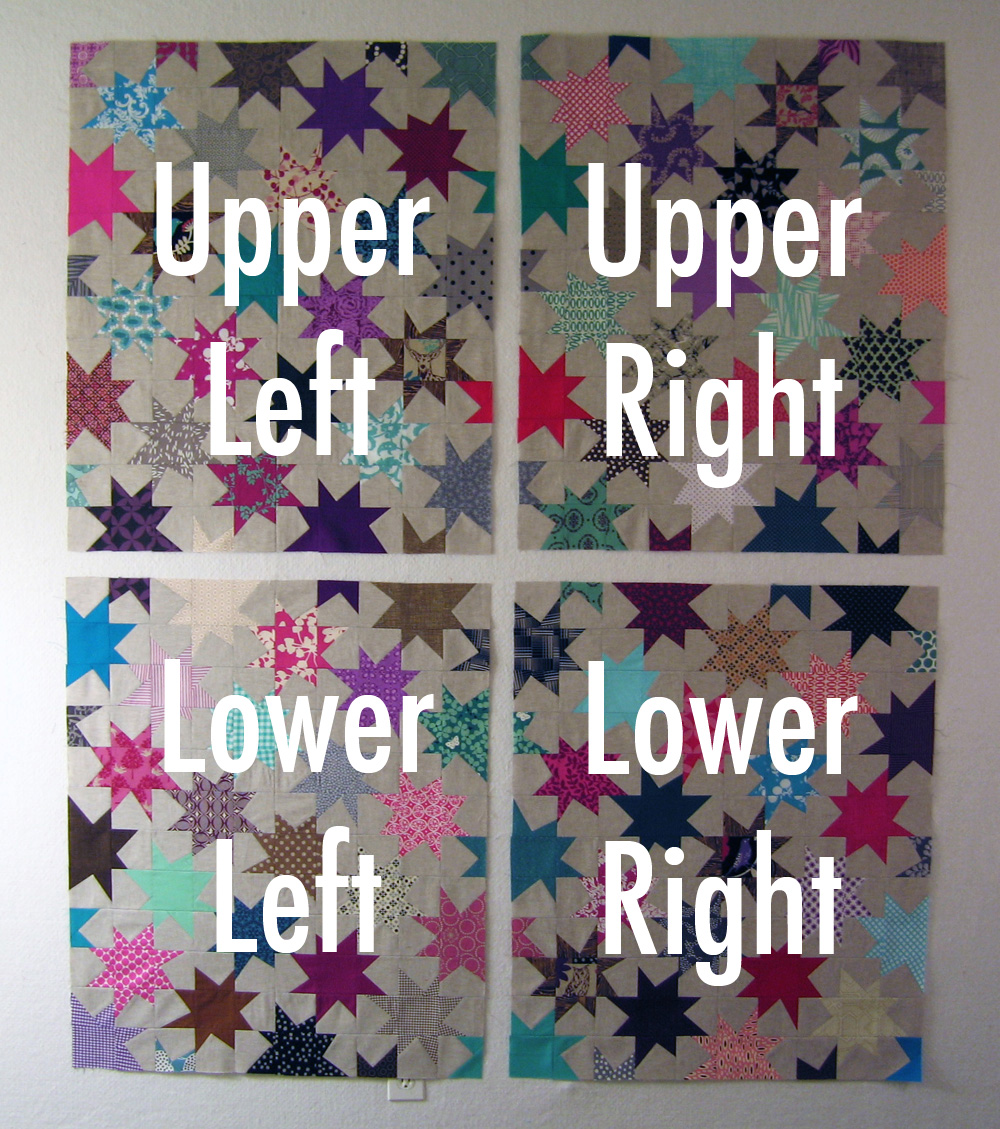
- Sew Block 1A to Block 1B to create a row. Sew Block 2A to Block 2B to create a second row and sew this row to the bottom of the first to create the Upper-Left Quadrant of the quilt top.
- Sew Block 1C to Block 1D to create a row. Sew Block 2C to Block 2D to create a second row and sew this row to the bottom of the first to create the Upper-Right Quadrant of the quilt top.
- Sew Block 3A to Block 3B to create a row. Sew Block 4A to Block 4B to create a second row and sew this row to the bottom of the first to create the Lower-Left Quadrant of the quilt top.
- Sew Block 3C to Block 3D to create a row. Sew Block 4C to Block 4D to create a second row and sew this row to the bottom of the first to create the Lower-Right Quadrant of the quilt top.
- Sew the Upper-Left Quadrant and the Upper-Right Quadrant together to make the Upper Half of the quilt top.
- Sew the Lower-Left Quadrant and the Lower-Right Quadrant together to make the Lower Half of the quilt top.
- Sew the Upper Half and the Lower Half together to finish the quilt top.

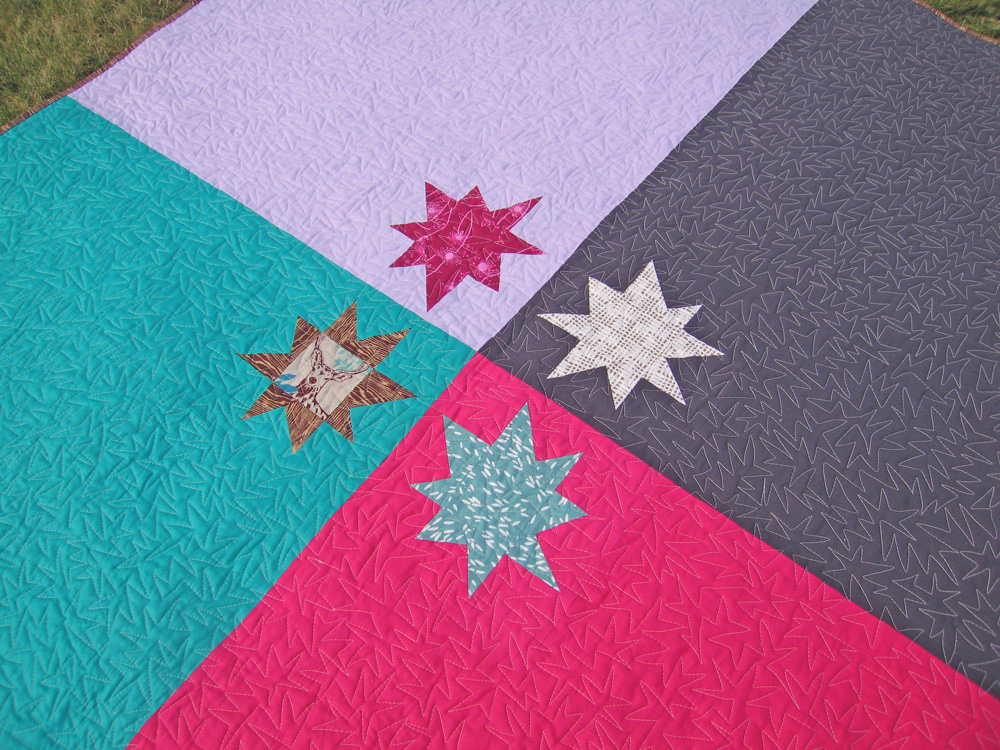
Making the Quilt Back
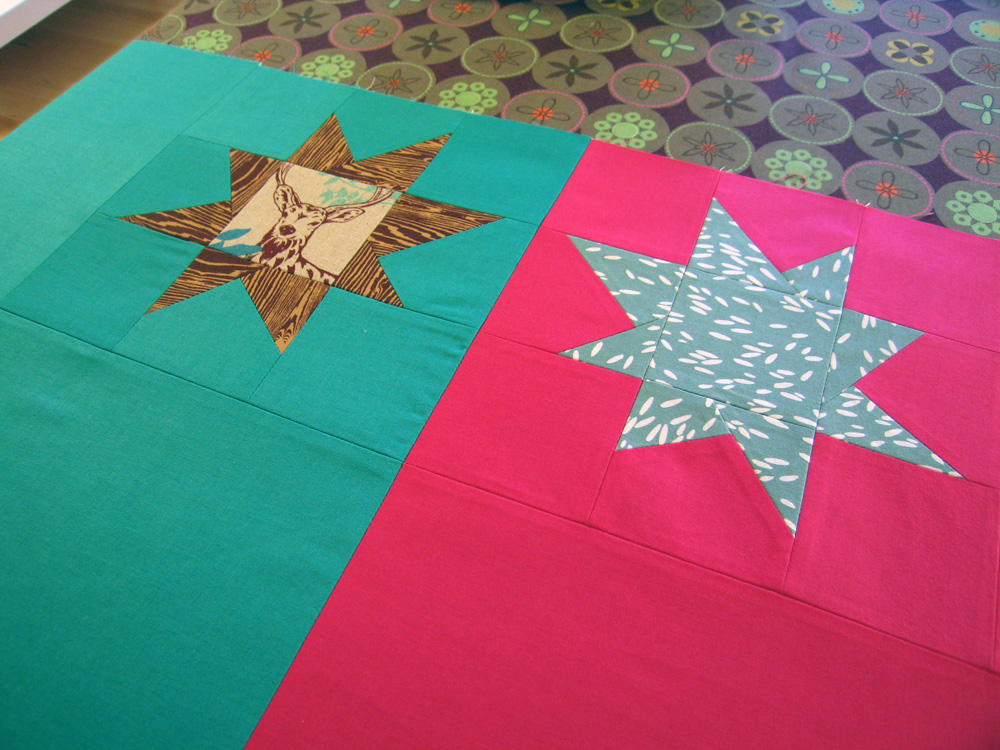
Each of the 1-1/4 yard pieces of solid fabric will be used to make one quadrant of the quilt back. Each quadrant will also include a star similar to the ones we made for the front of the quilt. For each star, you'll need a set of 5 squares, each 3-1/2" x 3-1/2". The stars will appear to be floating on a solid fabric background, so I recommend picking star fabrics that contrast with the solid fabric with which they'll be paired.
Cut the Fabric
Follow these directions for each of the 4 solid fabrics.
- Cut 1 strip 31-1/2" x width of fabric and trim to 31-1/2" x 34-1/2".
- Cut 1 strip 9-1/2" x width of fabric and trim to 9-1/2" x 25-1/2".
- From remaining fabric, cut 8 squares 3-1/2" x 3-1/2".
Make the Stars
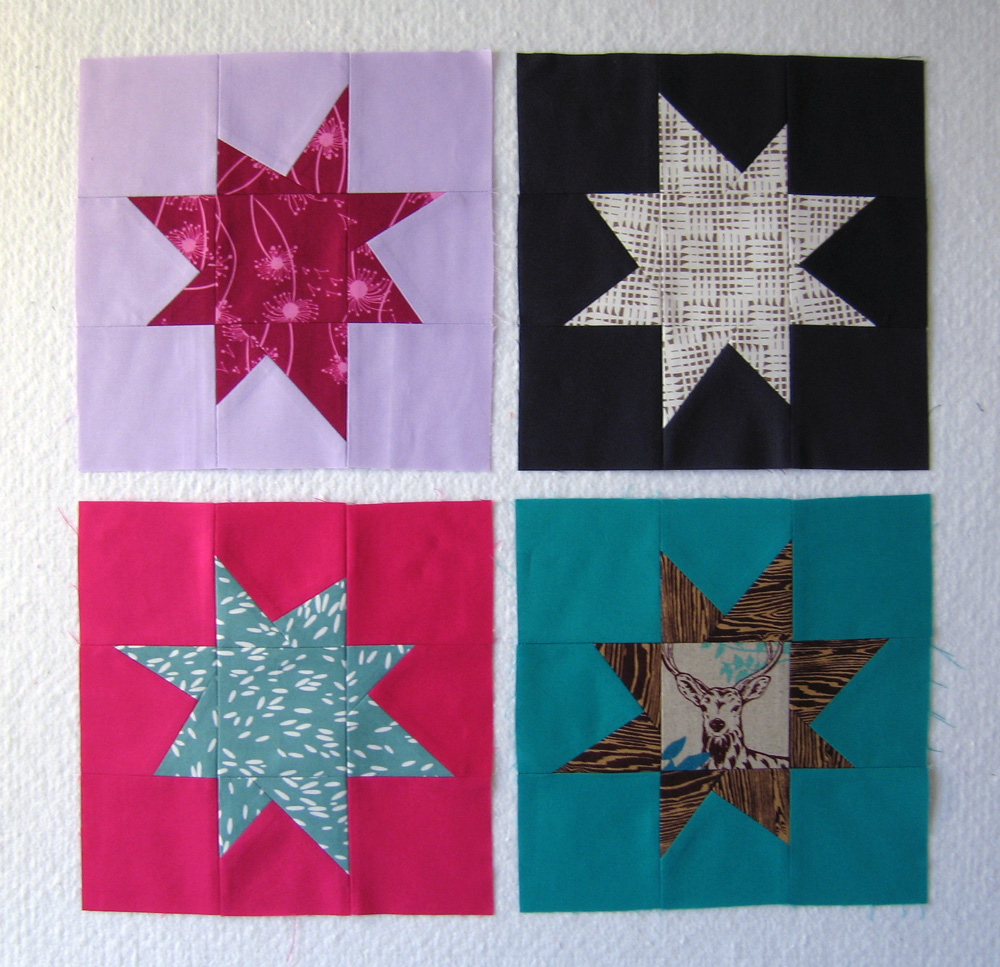
Make 4 sets of Whole Star components, one set for each quadrant of the quilt back, using 4 of the 3-1/2" x 3-1/2" solid fabric squares in place of the negative space fabric that you used on the quilt top. The stars on the quilt back aren't going to be nestled together. Instead sew the components you just made and the 4 remaining solid fabric squares together like a conventional star block (in a nine-patch formation with the solid squares in the four corners).
Repeat this process to make 4 star blocks, each with a different solid background.
Finish the Quilt Back
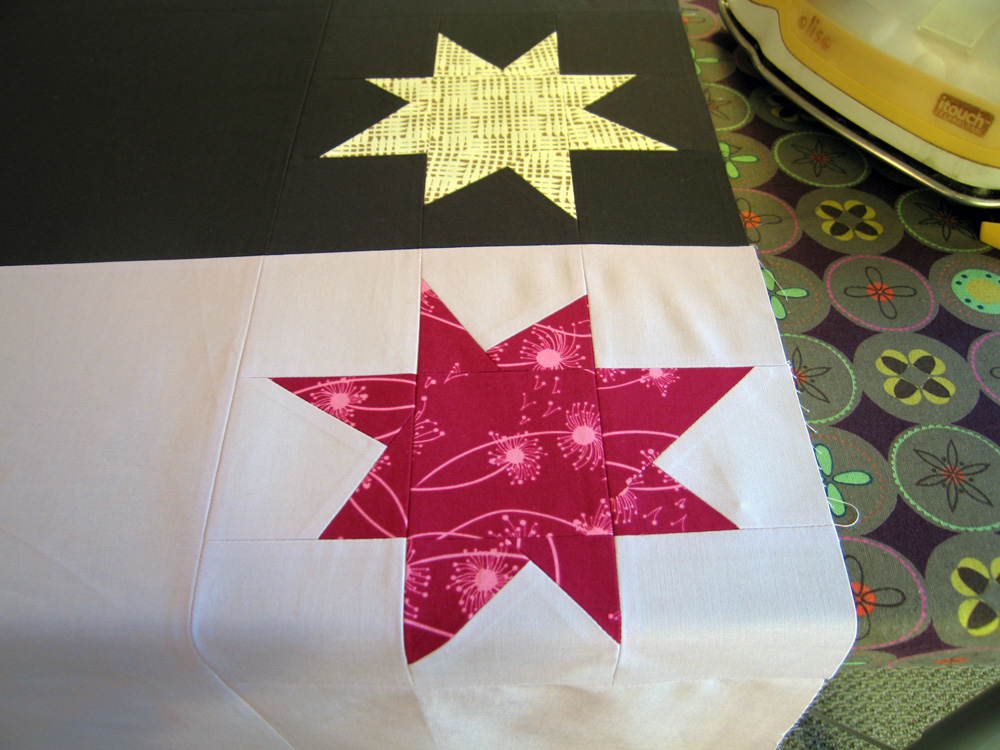
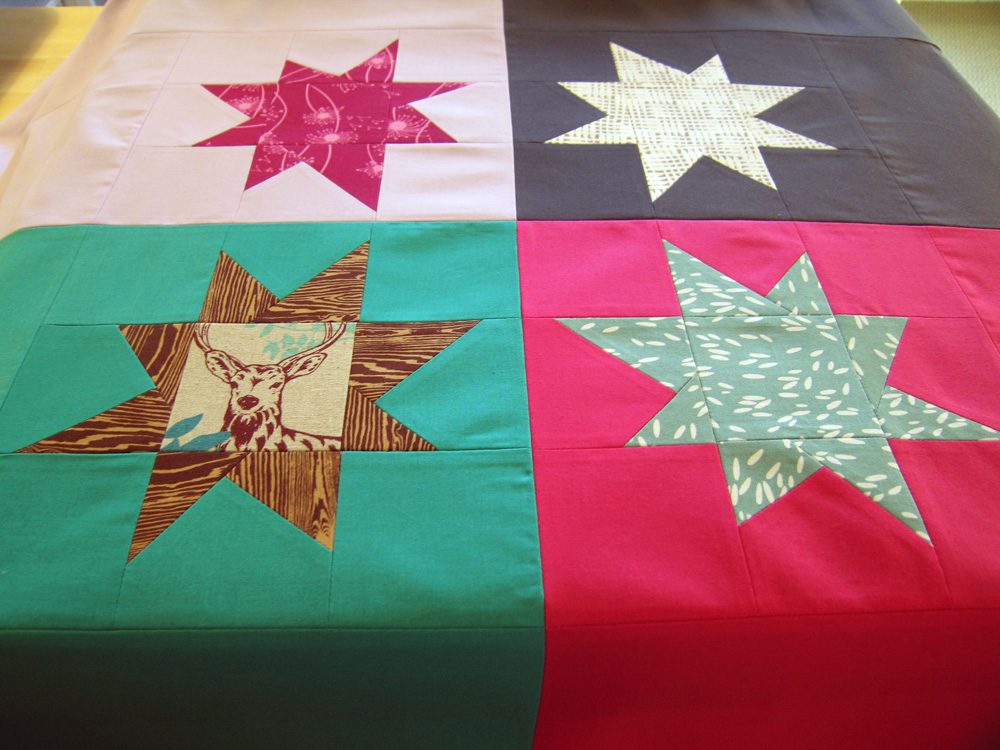
Arrange the 4 star blocks in 2 rows of 2, as you would like them to be arranged on the quilt back. From here, we'll sew the rest of the solid fabric onto each star, creating a quadrant of the quilt back.
(Note that the position of the stars in the bottom row in the photo above is different than my finished quilt back. I sewed my pieces together in the wrong order, but decided that I liked it better. It was, as Bob Ross would have said, a "happy accident.")
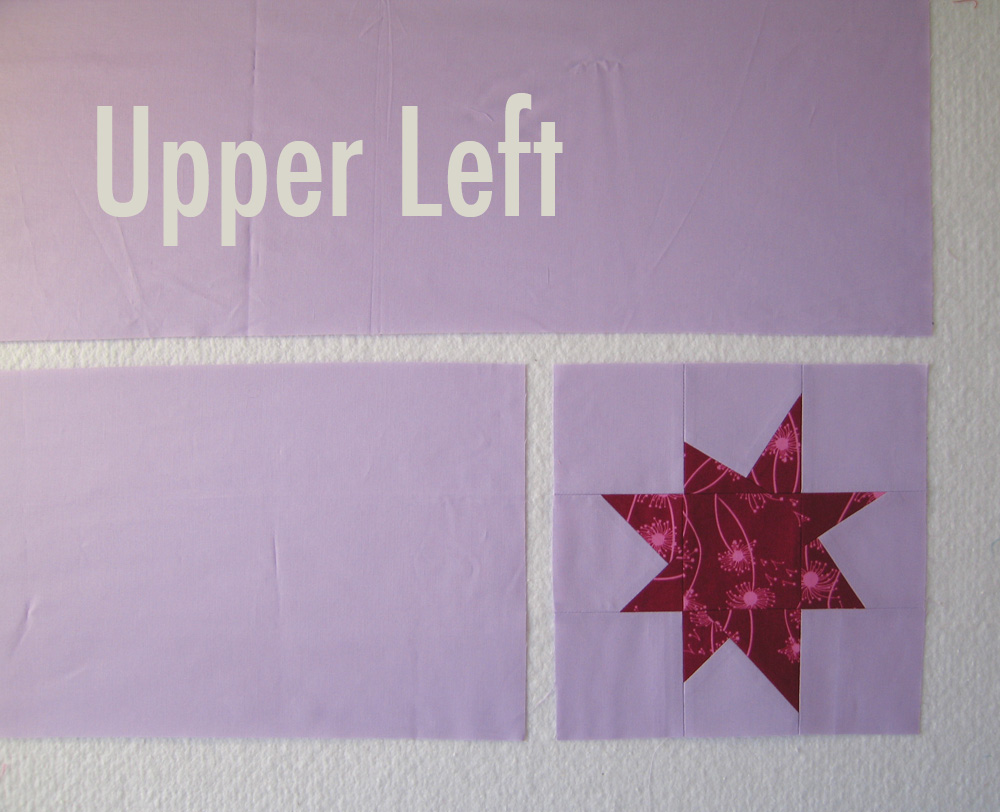
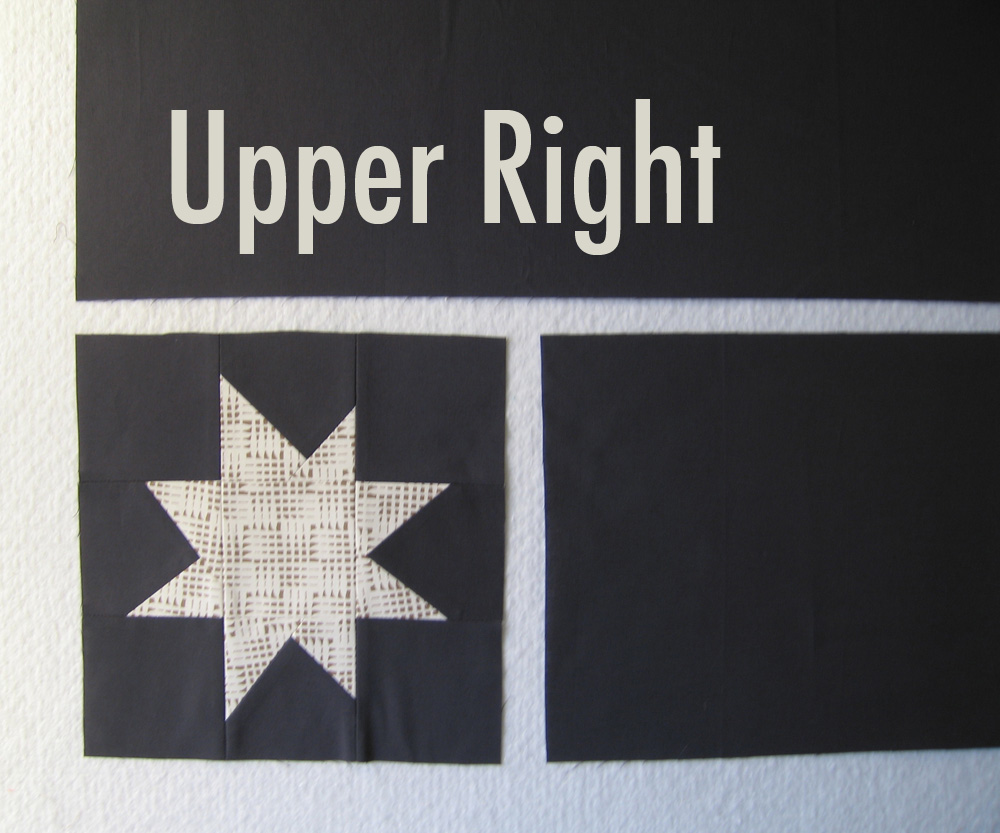
- Sew the 9-1/2" x 25-1/2" strip of matching solid fabric to the left side of the star block in the upper left of your arrangement. Sew the 31-1/2" x 34-1/2" piece of solid fabric to the top, matching 34-1/2" sides. This is the Upper Left quadrant of your quilt back, but the star should be in the lower right corner.
- Sew the 9-1/2" x 25-1/2" strip of matching solid fabric to the right side of the star block in the upper right of your arrangement. Sew the 31-1/2" x 34-1/2" piece of solid fabric to the top, matching 34-1/2" sides. This is the Upper Right quadrant of your quilt back, but the star should be in the lower left corner.
- Sew the Upper Left and Upper Right quadrants together, matching star blocks along the 40-1/2" sides. This is the Upper Half of your quilt back. The stars should be next to each other at the bottom center.
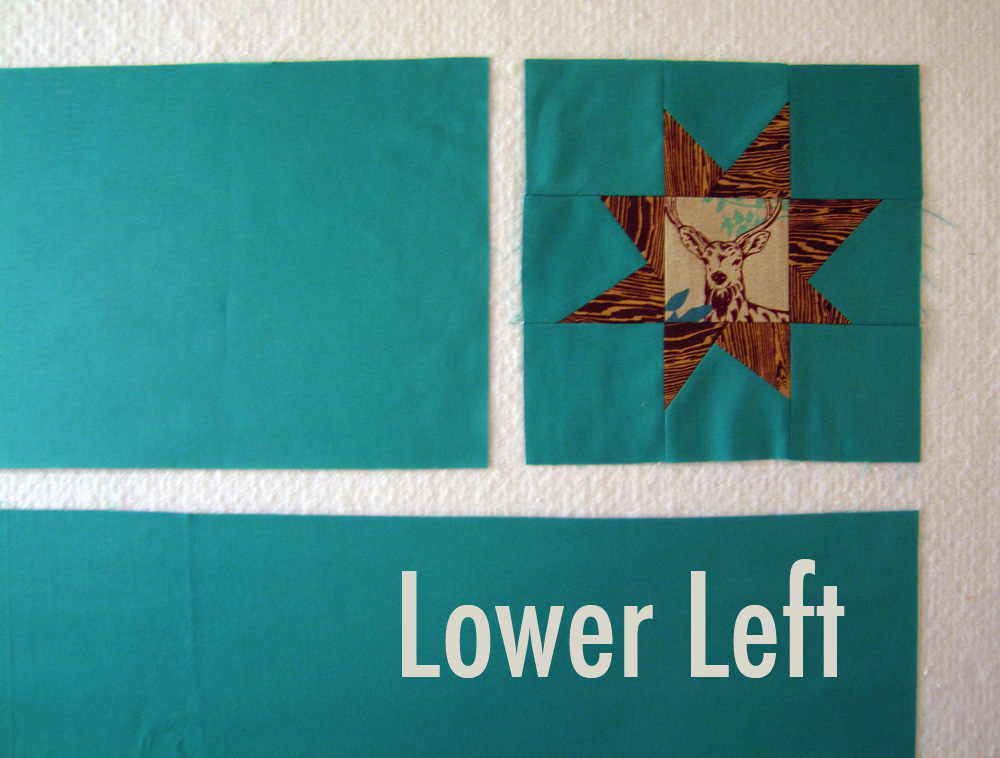
- Sew the 9-1/2" x 25-1/2" strip of matching solid fabric to the left side of the star block in the lower left of your arrangement. Sew the 31-1/2" x 34-1/2" piece of solid fabric to the bottom, matching 34-1/2" sides. This is the Lower Left quadrant of your quilt back, but the star should be in the upper right corner.
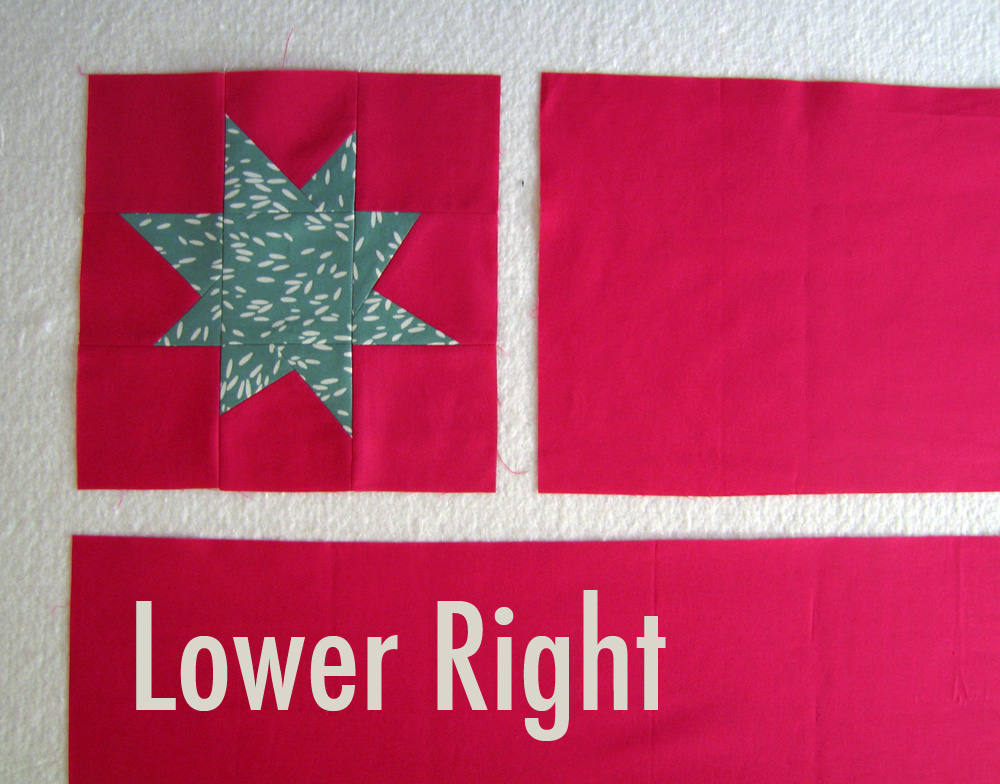
- Sew the 9-1/2" x 25-1/2" strip of matching solid fabric to the right side of the star block in the lower right of your arrangement. Sew the 31-1/2" x 34-1/2" piece of solid fabric to the bottom, matching 34-1/2" sides. This is the Lower Right quadrant of your quilt back, but the star should be in the upper left corner.
- Sew the Lower Left and Lower Right quadrants together, matching star blocks along the 40-1/2" sides. This is the Lower Half of your quilt back. The stars should be next to each other at the top center.
- Sew the Upper and Lower halves together, matching star blocks at the center.
Your finished quilt back should measure approximately 68" x 80".
Finish the Quilt
Sandwich and quilt as desired. I free-motion quilted my Sparkle Punch quilt in an allover pattern of meandering points. From binding fabric, cut 7 strips 2-1/2" x width of fabric and bind as desired.